Sending an Automated Campaign
Before we send an Automated Campaign have a source to receive events is pre-requisite:
- In order to receive WhatsApp events, all you need is to have an active WABA in your project and after you send a Broadcast Campaign, you can send Automated Campaign using sent, delivered, read events.
- In order to receive Shopify events, you need to complete your Shopify integration in Integrations tab (You can follow these steps to complete the integration -> https://console-docs.gupshup.io/docs/shopify-integration)
Steps to send an Automated Campaign:
-
You can access Automated Campaigns in the next navigation under Campaigns section

-
Now by clicking on '+ New Automated Campaign' we can create a new campaign
-
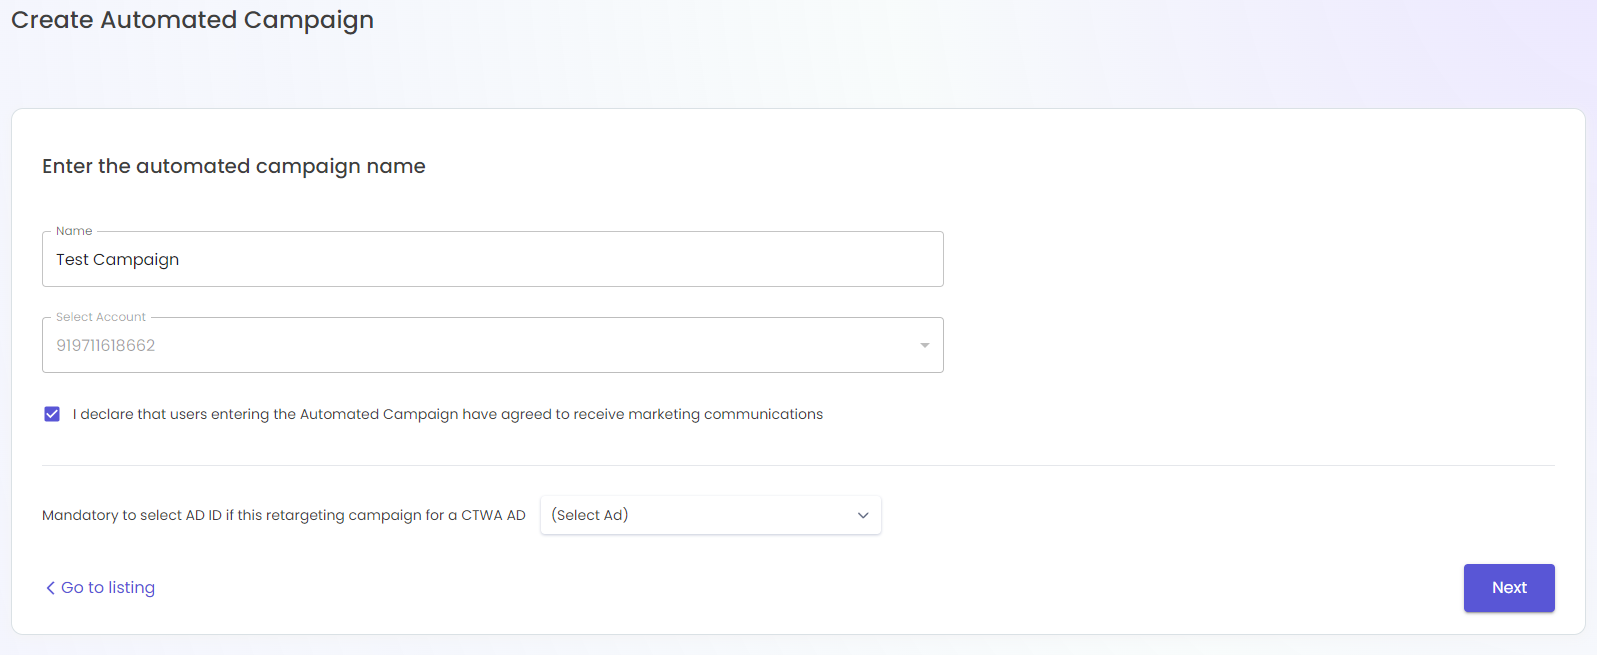
On the 1st screen we can add the name of the Automated Campaign and the WABA (sender number) is automatically selected. You also need to declare that users receiving the message has opted in.
-
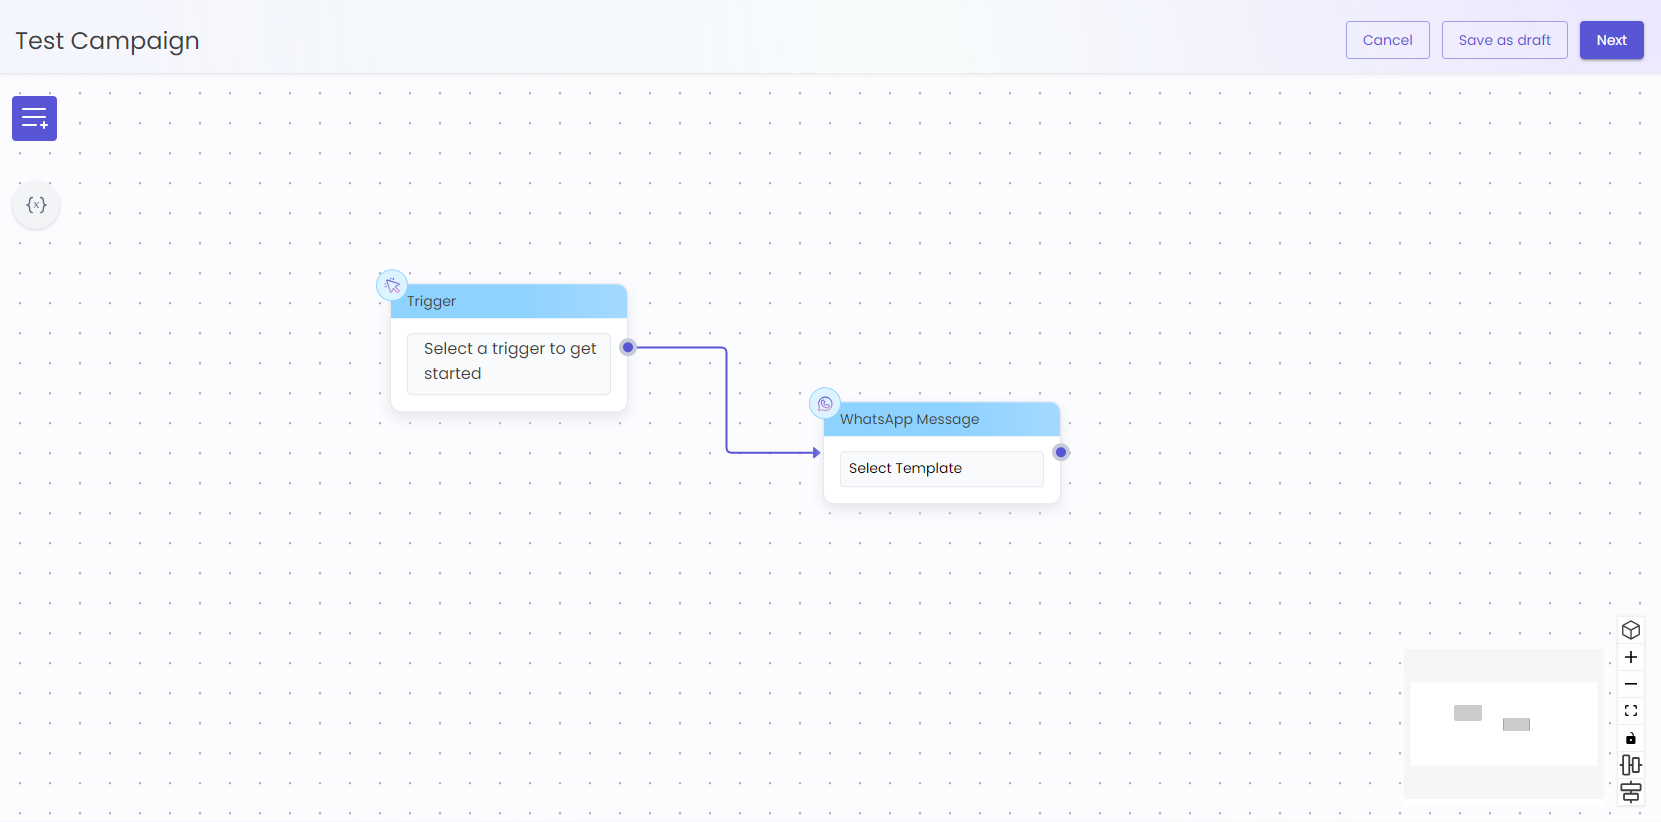
In the next step, you enter the Canvas with 2 nodes a trigger node and WhatsApp message node. The 2 nodes required at the minimum to send an Automated Campaign.
-
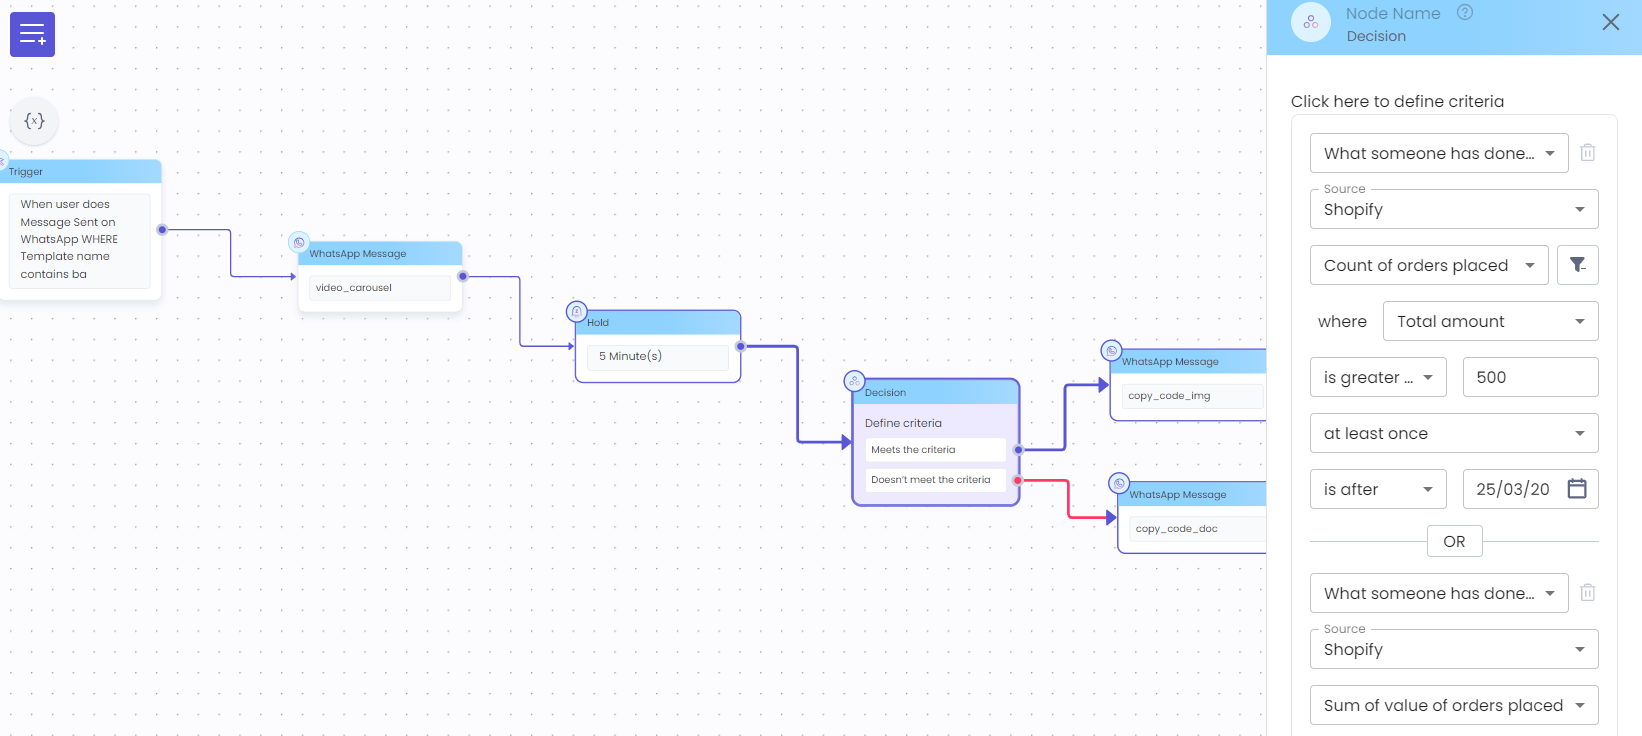
In total we have 4 nodes:
-
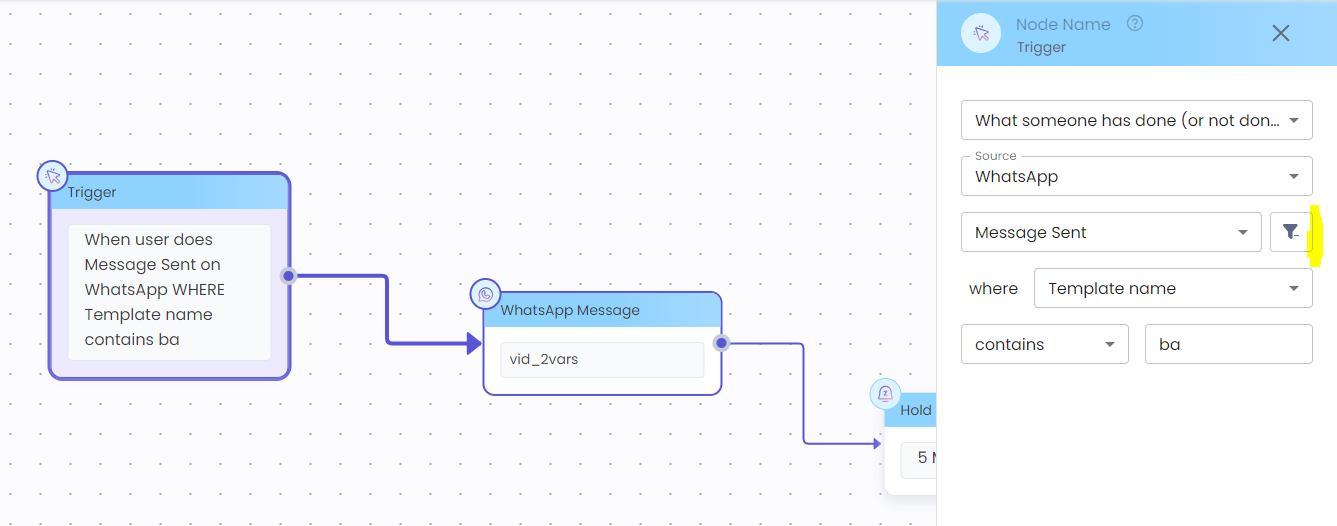
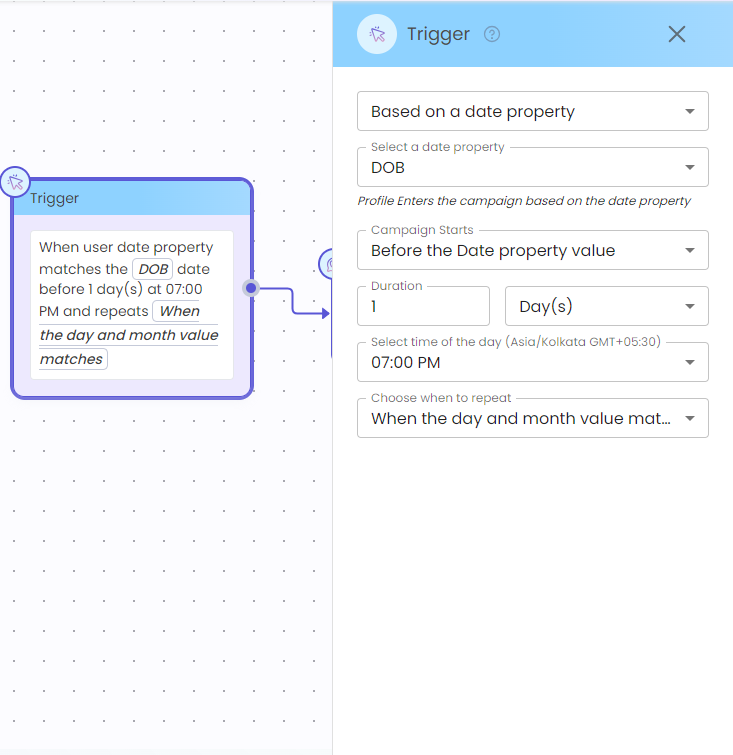
Trigger node: Where we define the trigger condition in which an user enters an Automated Campaign (Note: We can also set conditions based on the properties of the event), triggers are of 2 types
- What someone has done (or not done): When a user performs an action (eg: Place order on Shopify) a trigger occurs and user enters the campaign. Custom events can also be set as triggers.
-
Based on a date property: When a date property defined in personalize equals system value a trigger occurs and user enters the automated campaign. eg: (When "DOB" is today, send message "1 day before the date property value" at "7PM" and repeats "every year")
-
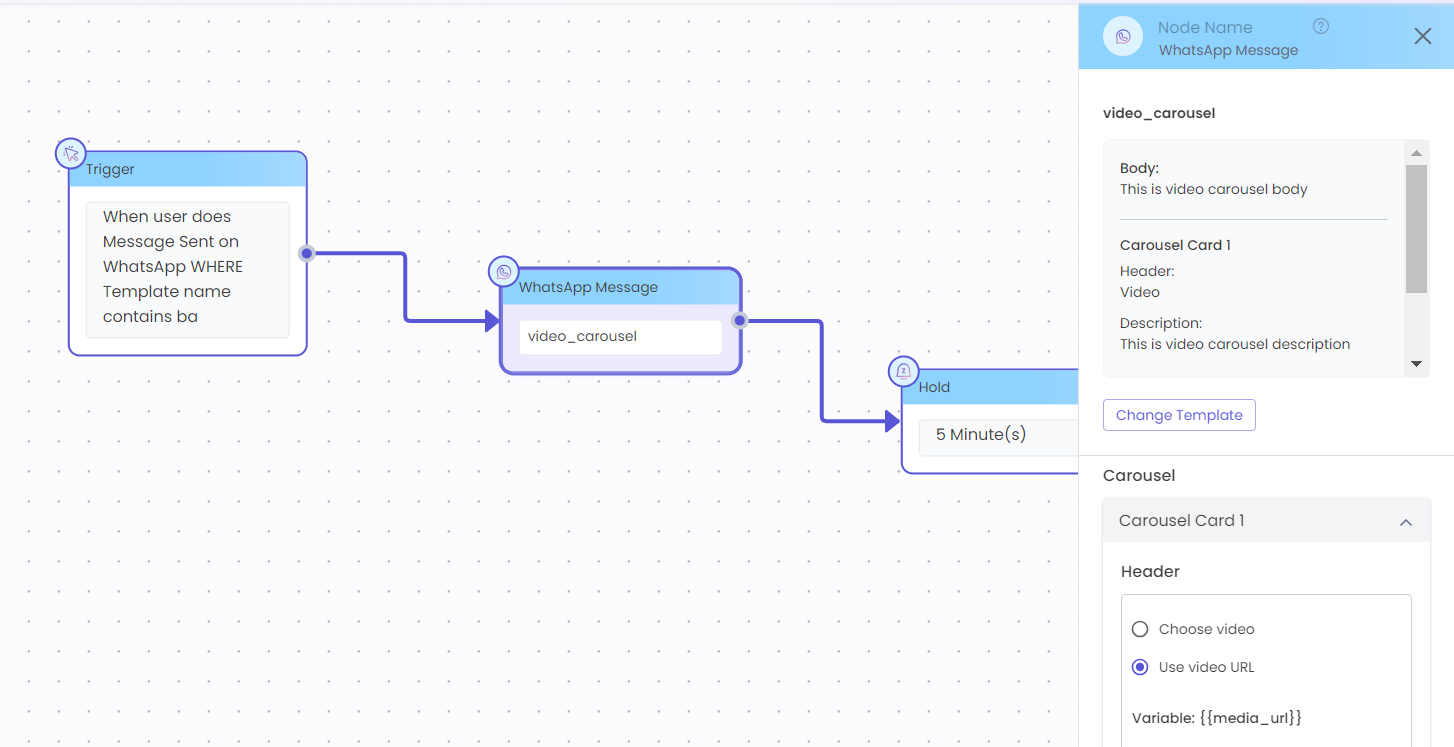
WhatsApp Message node: In this node, client can select one of the approved templates to send to whichever end user traverses this node
-
Automated Campaigns also supports some of the latest template types like Button list, Carousel, LTO
-
-
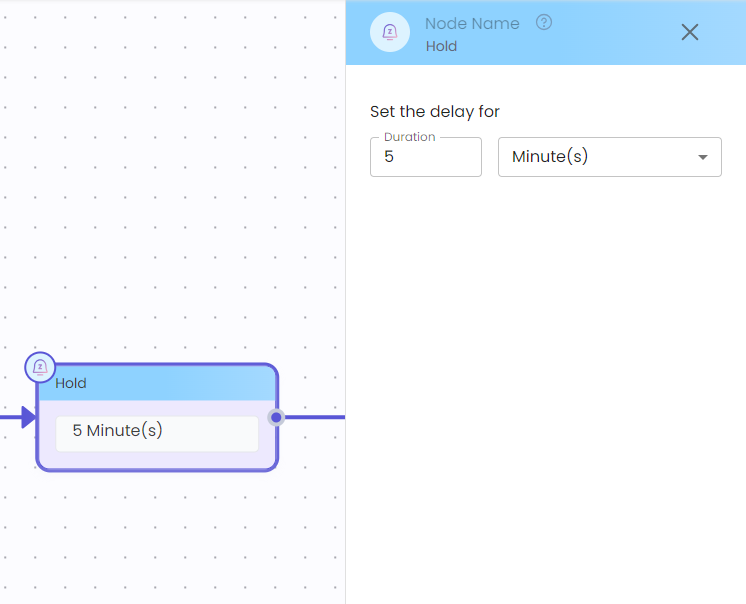
Hold node: Client can set a duration to hold without any traversal for a particular node
-
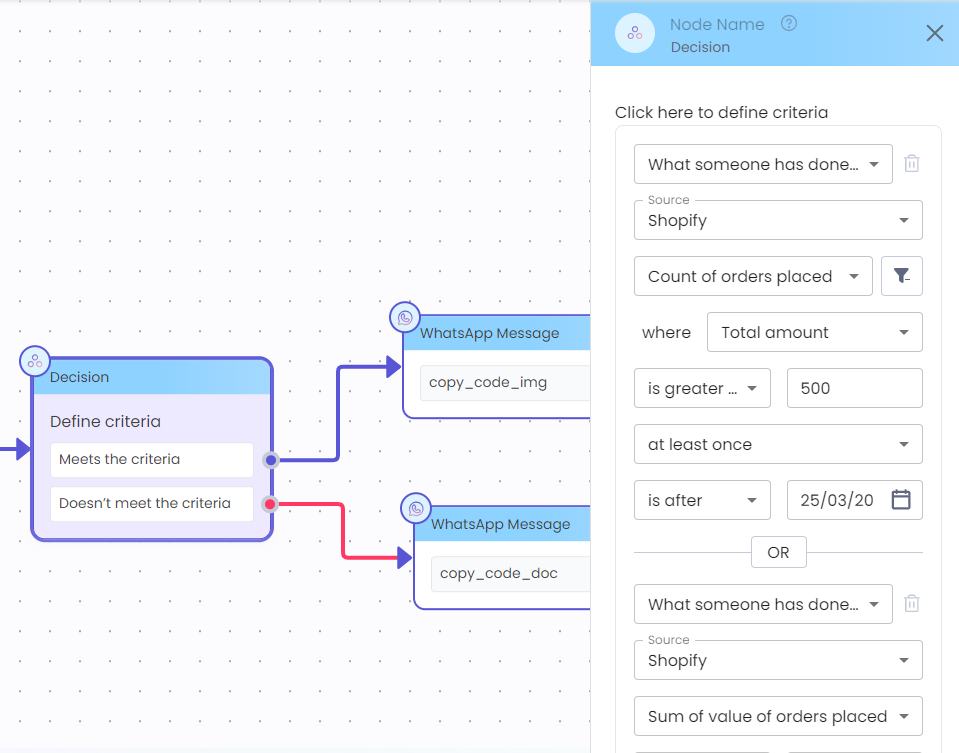
Decision node: Depending on whether a user is meeting or not meeting a criteria the users subsequent path is determined. Decision node behaves and supports same set of operators as the segmentation in Customer360
-
-
Using these 4 nodes in the plug and play like interface you can create highly personalized Automated Campaigns
-
Once you click on next, you can schedule a campaign - each Automated Campaign will have a start time and end time. Only when the event occurs within the mentioned start and end time, the user enters the Automated Campaign.
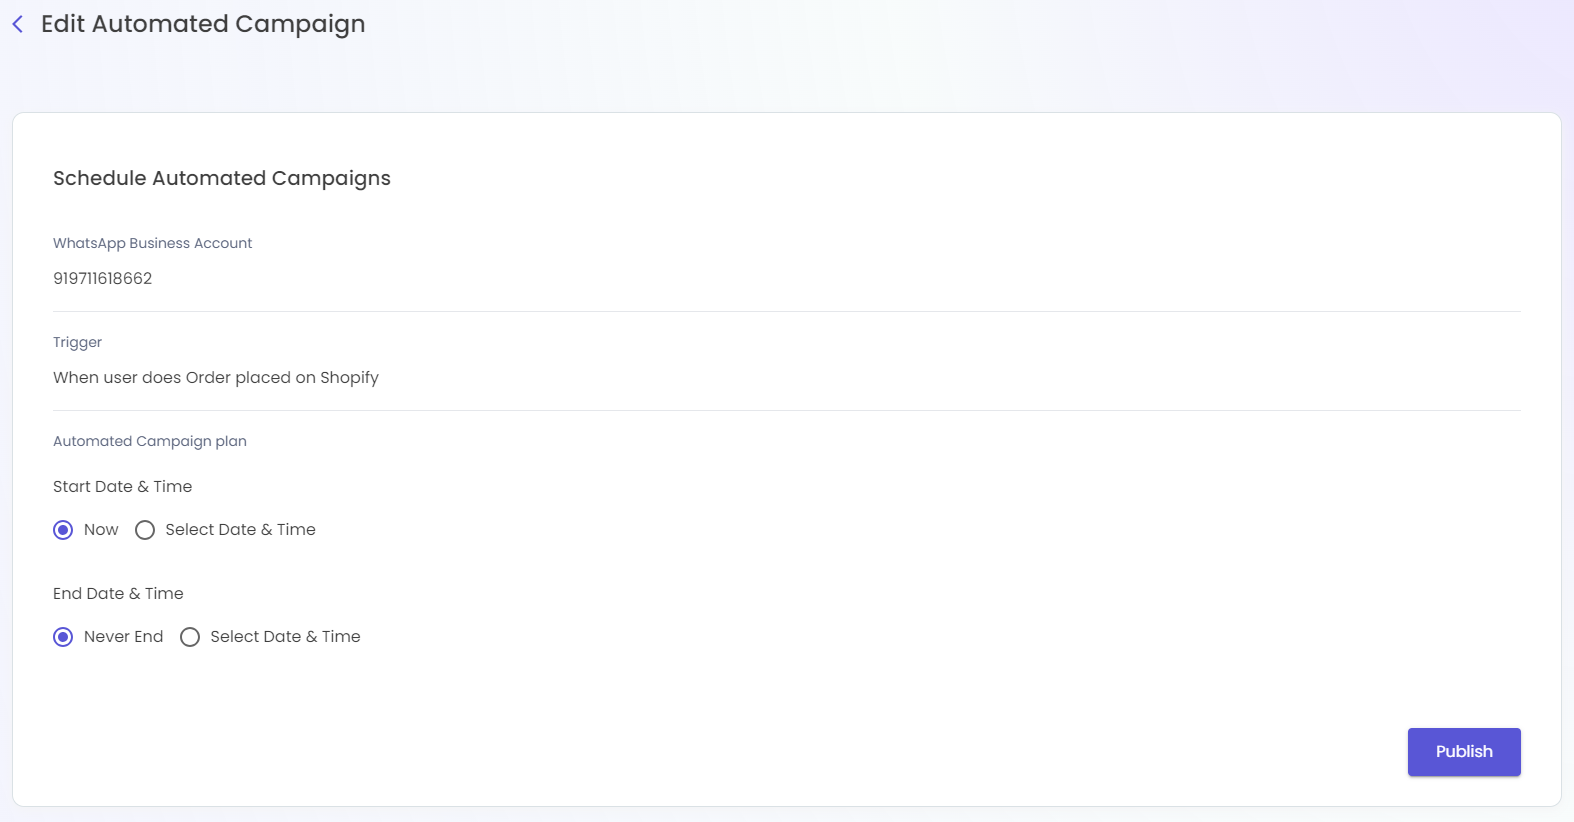
Once you publish a Campaign we get to the listing screen we can check the Campaign status an analytics in the listing screen. Each Automated Campaign can have 6 statuses.
- Draft - When the Campaign is Saved as a draft and yet to Published. It is in draft state and the Campaign can be edited in draft state. The draft Campaign can also be deleted.
- Scheduled - When a Campaign is scheduled for a specific time in the future. It displays as scheduled. The Campaign can be edited in this state.
- Publishing - An intermediate status before the Campaign goes live. The Campaign can't be edited in this state.
- Live - When a Campaign is between the start and end time. The Campaign can't be edited in this state.
- Paused - A live Campaign can be paused. In the paused state no user enters the Campaign. The Campaign also be resumed if the Campaign end time has not been reached
- Completed - Whenever the Campaign reaches it's end time, the Automated Campaign state changes to completed.

Updated 9 months ago