Image Node
Image Node
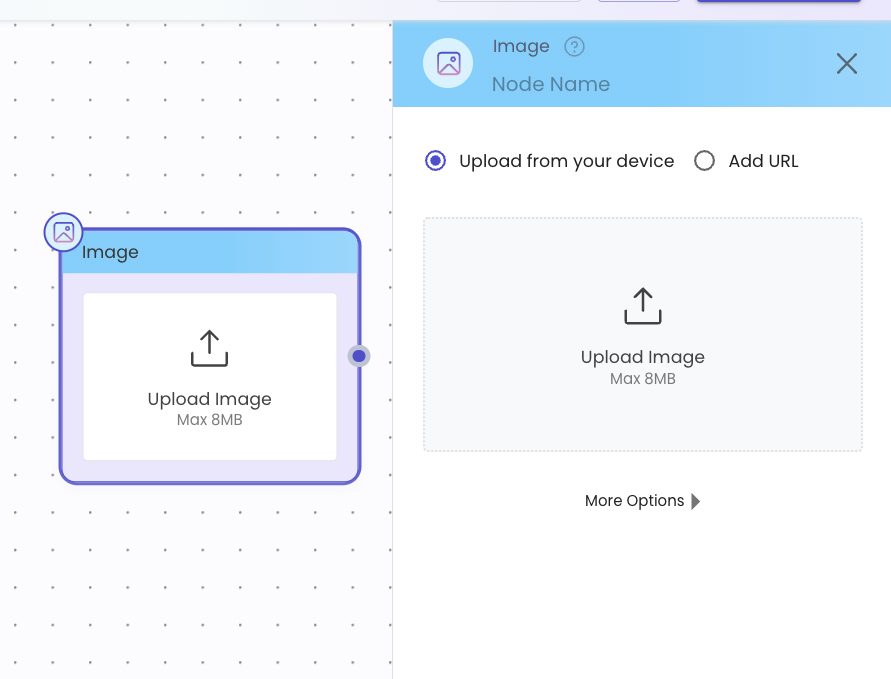
The Image Node allows bot designers to send visual media (images) as part of a chatbot conversation within Journey Builder on Gupshup's Console.
You can add an image either by uploading it directly from your local system or by providing a public URL.
This makes it easy to share product images, visual confirmations, maps, and other content in a conversational flow.
📘 Overview
The Image Node helps make chatbot conversations more engaging by allowing the use of static or dynamic images.
Designers can configure images using a public URL or reference dynamic variables fetched from API calls on previous nodes.
The node supports common image formats and works across all major channels supported by Gupshup.
💡 When to Use
Share product or catalog images during shopping flows and product browsing experiences.
Send banners, flyers, or offer visuals during promotional campaigns and announcements.
Share QR codes, maps, or receipts dynamically based on user interactions.
Add visual confirmation messages to make chat responses more engaging and interactive.
⚙️ Configuration Steps
Step 1: Add the Image Node
- On the Journey Builder canvas, open the Message node category.
2. Drag and drop the Image Node onto the canvas.
3. Connect it to the previous node (such as API Node or Prompt Node).
Step 2: Choose Image Source
The Image Node supports two types of image sources:
🔁 Using Dynamic URLs
Dynamic URLs allow the image to change for each user, based on the data stored in variables or API responses.
🧩 Example Scenario
A user selects a product, and the chatbot fetches its image URL via an API call.
Sample API Response:
{
  "product_name": "Leather Wallet",
  "product_image_url": "https://cdn.shop.com/images/leather_wallet.png"
}
⚙️ Configuration Steps
Step 1: Save API Response
Save the API response field (for example, product_image_url) into a variable:
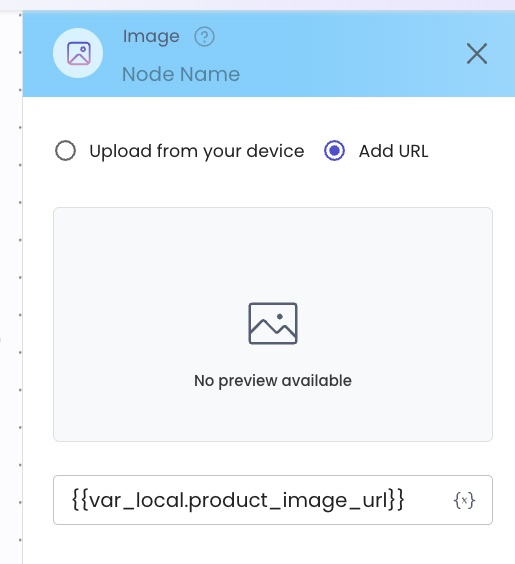
var_local.product_image_urlStep 2: Use Variable
Use the variable placeholder instead of a static link:
{{var_local.product_image_url}}When the bot runs, the variable will be replaced with the actual image URL from the API response.