Android Native
Prerequisites
- Android OS version 9.0 or above
- Android Studio version 2022.3.1 or above
Setup
- Add a custom repository to the dependency resolution block.
// You can access this block in the "build.gradle" file at project level.

dependencyResolutionManagement {
    repositories {
        google()
        mavenCentral()
        maven {
            url = uri("https://nexus.gupshup.tech/repository/android")
            credentials {
                username = "dev.nexus"
                password = "devNexus"
            }
        }
    }
}
// You can access this block in "settings.gradle.kts" or "build.gradle.kts" file at project level depending on the project structure you are using.
// For more info, please visit: https://developer.android.com/build/remote-repositories#kts
dependencyResolutionManagement {
repositories {
google()
mavenCentral()
maven {
url = uri("https://nexus.gupshup.tech/repository/android")
credentials {
username = "dev.nexus"
password = "devNexus"
}
}
}
}- Based on selected build configuration language during project creation, add the below dependency.
// Add the following lines to your project level build.gradle file and build/sync project.

implementation 'io.gupshup:gipchat:1.1.0'
// Add the following lines to your project level build.gradle file and build/sync project.
implementation("io.gupshup:gipchat:1.1.0")Granting Permissions to the SDK
- Add the following permissions in your project manifest file.
- The following code needs to be added in AndroidManifest.xml file for enabling upload file and images/media at the mobile application level.
<uses-permission android:name="android.permission.READ_EXTERNAL_STORAGE" />
<uses-permission android:name="android.permission.MODIFY_AUDIO_SETTINGS" />
<uses-permission android:name="android.permission.RECORD_AUDIO" />
<uses-permission android:name="android.permission.READ_MEDIA_IMAGES" />
Setting the App ID, Developer Key, User Name and User ID
- The following code needs to added to set these details using
GipChatclass as shown below.- App ID: Gupshup Web channel's app ID
- User Name (set only if available): The end customer's name
- User ID (set only if available): The external/custom ID assigned to the end customer
GipChat.setAppId(appId)
GipChat.setUserName(userName)
GipChat.setUserId(userId)
GipChat.setDevKey(devKey)
Getting the App ID
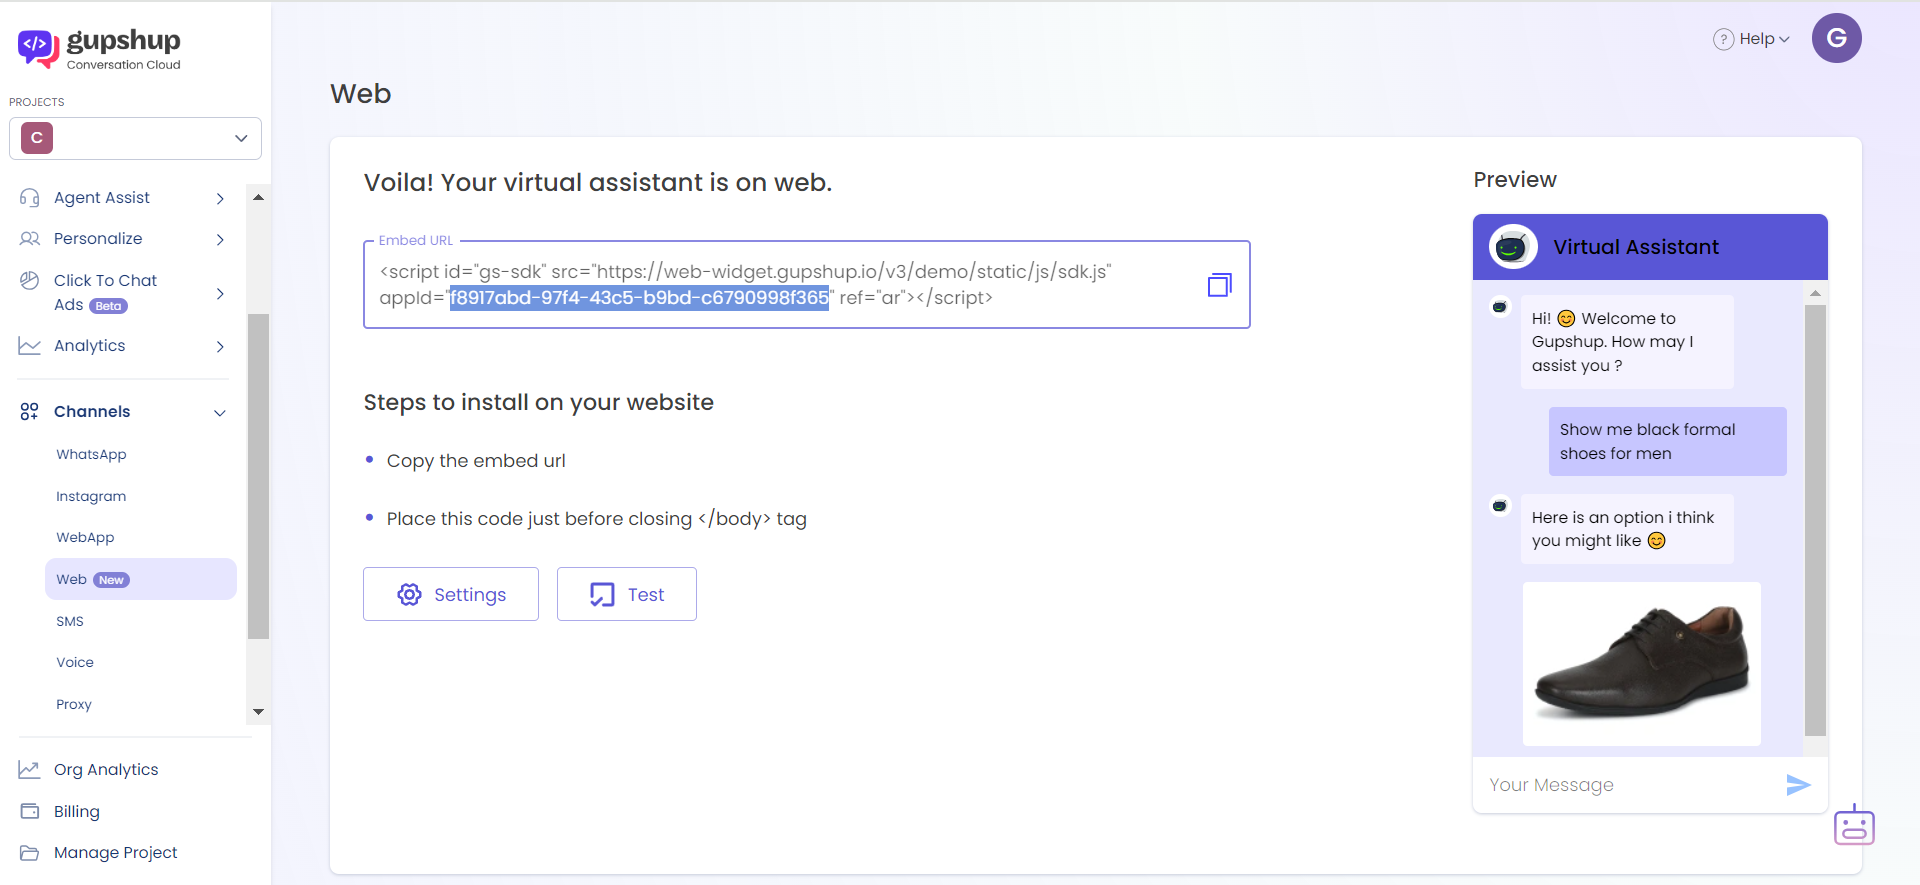
- Log in to your Gupshup Console account and go to Web under Channels in the navigation bar on the left.
- The App ID can be located in the Embed URL as shown below.
Initializing the SDK
The App ID, User Name and User ID must be set before you initialize the SDK.
- To initialize the SDK, use the
initializemethod and pass context as shown below in code snippet.- If SDK is successfully initialized, it will return the value as
truein boolean format. - You can store this value if you wish to update your mobile application UI or to show a re-initialization button after successful initialization.
- If SDK is successfully initialized, it will return the value as
// Add the following lines to your Activity/Application where you want to initialize the SDK.

GipChat.initialize(context) { value ->
   initialized = value
}If you have already initialized the SDK, it can be re-initialized similarly by using the
GipChat.initializemethod.
Showing the chat screen
- You can simply call
GipChat.show()once the SDK is initialized successfully to take the user to the chat screen.
GipChat.show()Closing the chat session
- To close the chat session, call the
GipChat.close()method ofGipChatclass.
GipChat.close()