Assign/unassign Modules to a Member
Let us walk through the steps required to assign modules to members within a project.
Step 1: Login as Project Admin on the Console
To assign modules to members, you need to log in as a Project Admin on the Console. Use the link provided to access the Console and enter your login credentials.
Step 2: Navigate to the Members Tab
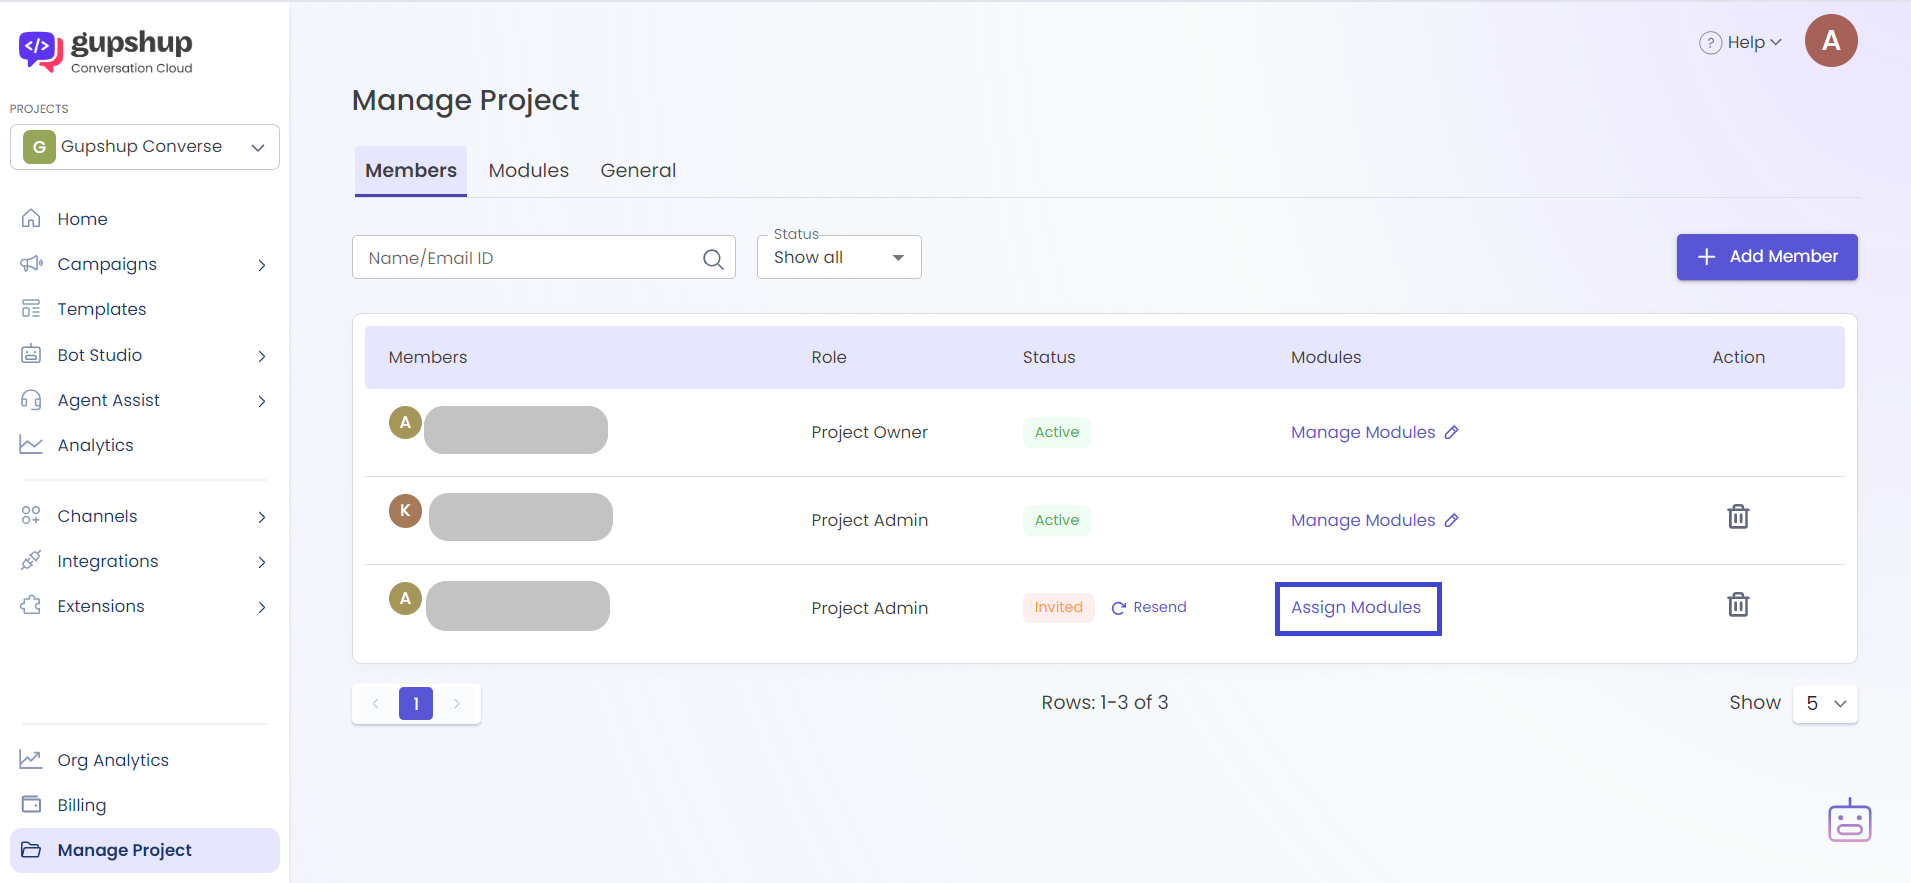
Once you are logged in, click on "Manage Project" on the left navigation bar. From there, navigate to the "Members" tab.
Step 3: Search for the Member and Click on Assign Modules
On the Members tab, search for the member you wish to assign modules. Once you have found the member, click on "Assign Modules."

Step 4: Select the Modules to Assign
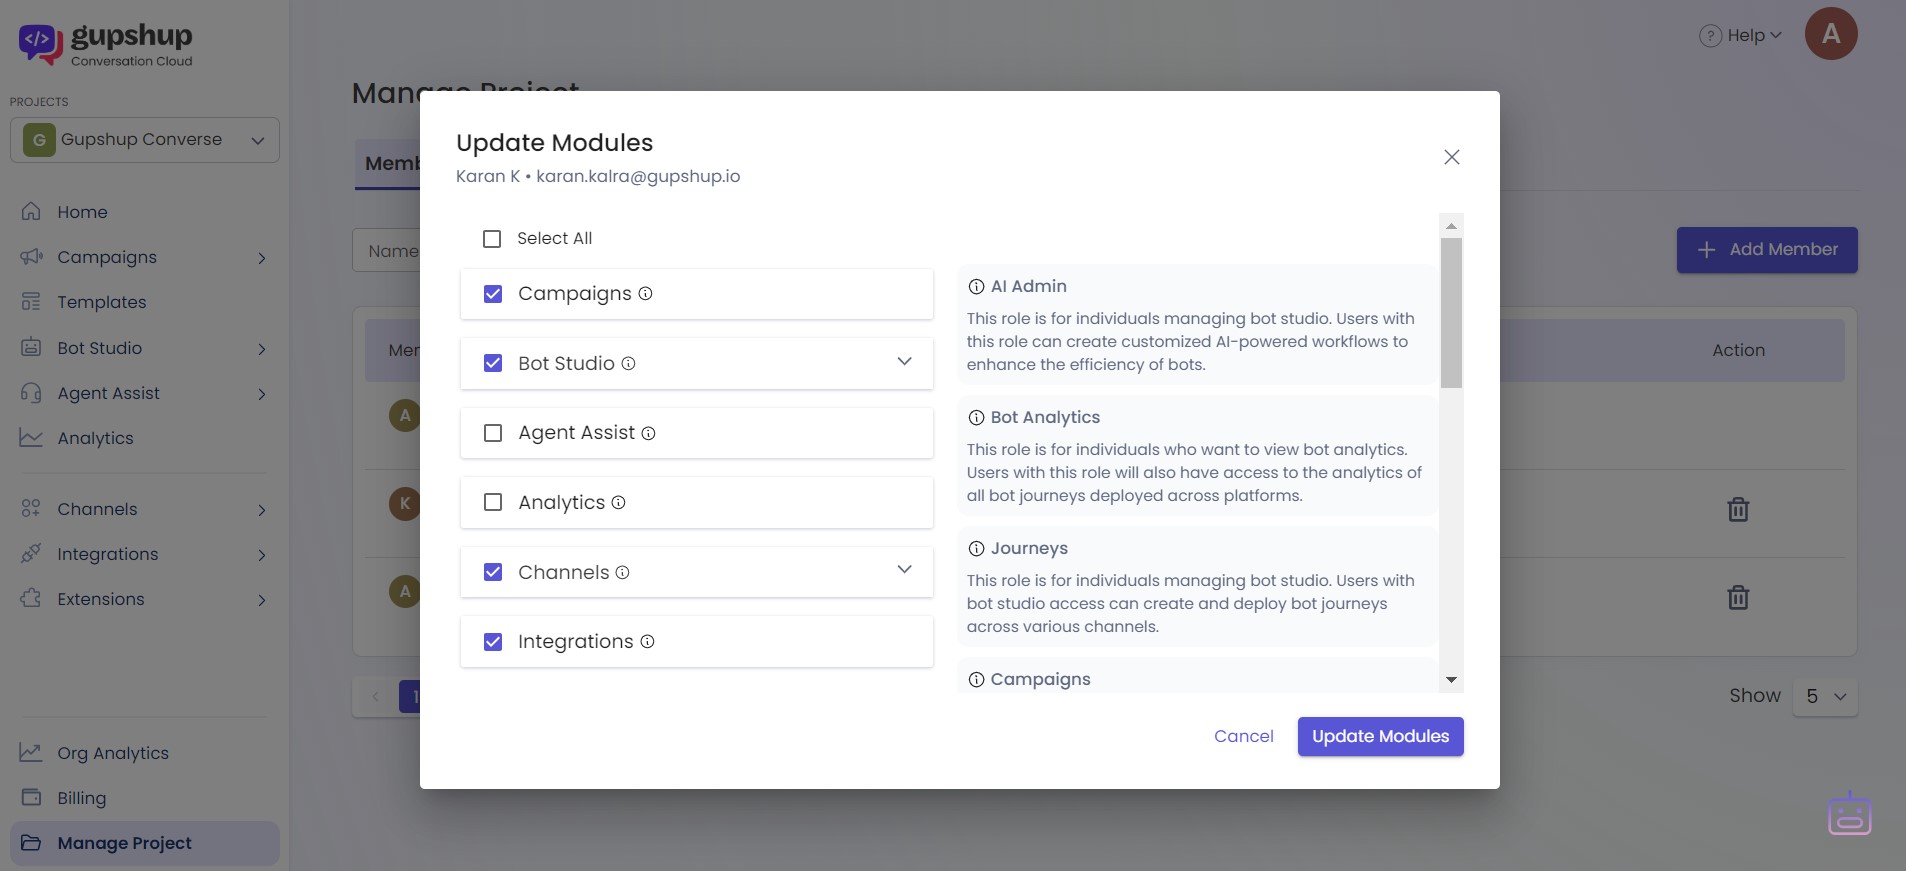
Next, select the modules that you wish to assign to the member. You can choose to select all modules or only a few, depending on the member's role and responsibilities.
Please note that if you're using Gupshup's legacy services (*.smsgupshup.com), each of the enterprise account is treated as a module and can be given a name in the "Modules" tab on the same screen. So, you can assign an enterprise account named "SMS South" to Member A and Member B, and enterprise account named "SMS North" to User A and User C.
Step 5: Assign Modules
After selecting the modules, click on the "Assign Modules" button to complete the process. The selected modules will now be assigned to the member.
Unassign a Module to a Member
- To Unassign a Module, click on the 'Manage Modules' CTA in the "Modules" column.
- Unselect the modules that needs to be removed.

- Click on "Update Modules" button to update the modules to a member.
If you have any queries or concerns regarding the assigned services, you can always contact [email protected] for assistance.
Updated 10 months ago