Getting Started with Bot Studio
The Landing Page (Journeys)
Journeys Landing Page
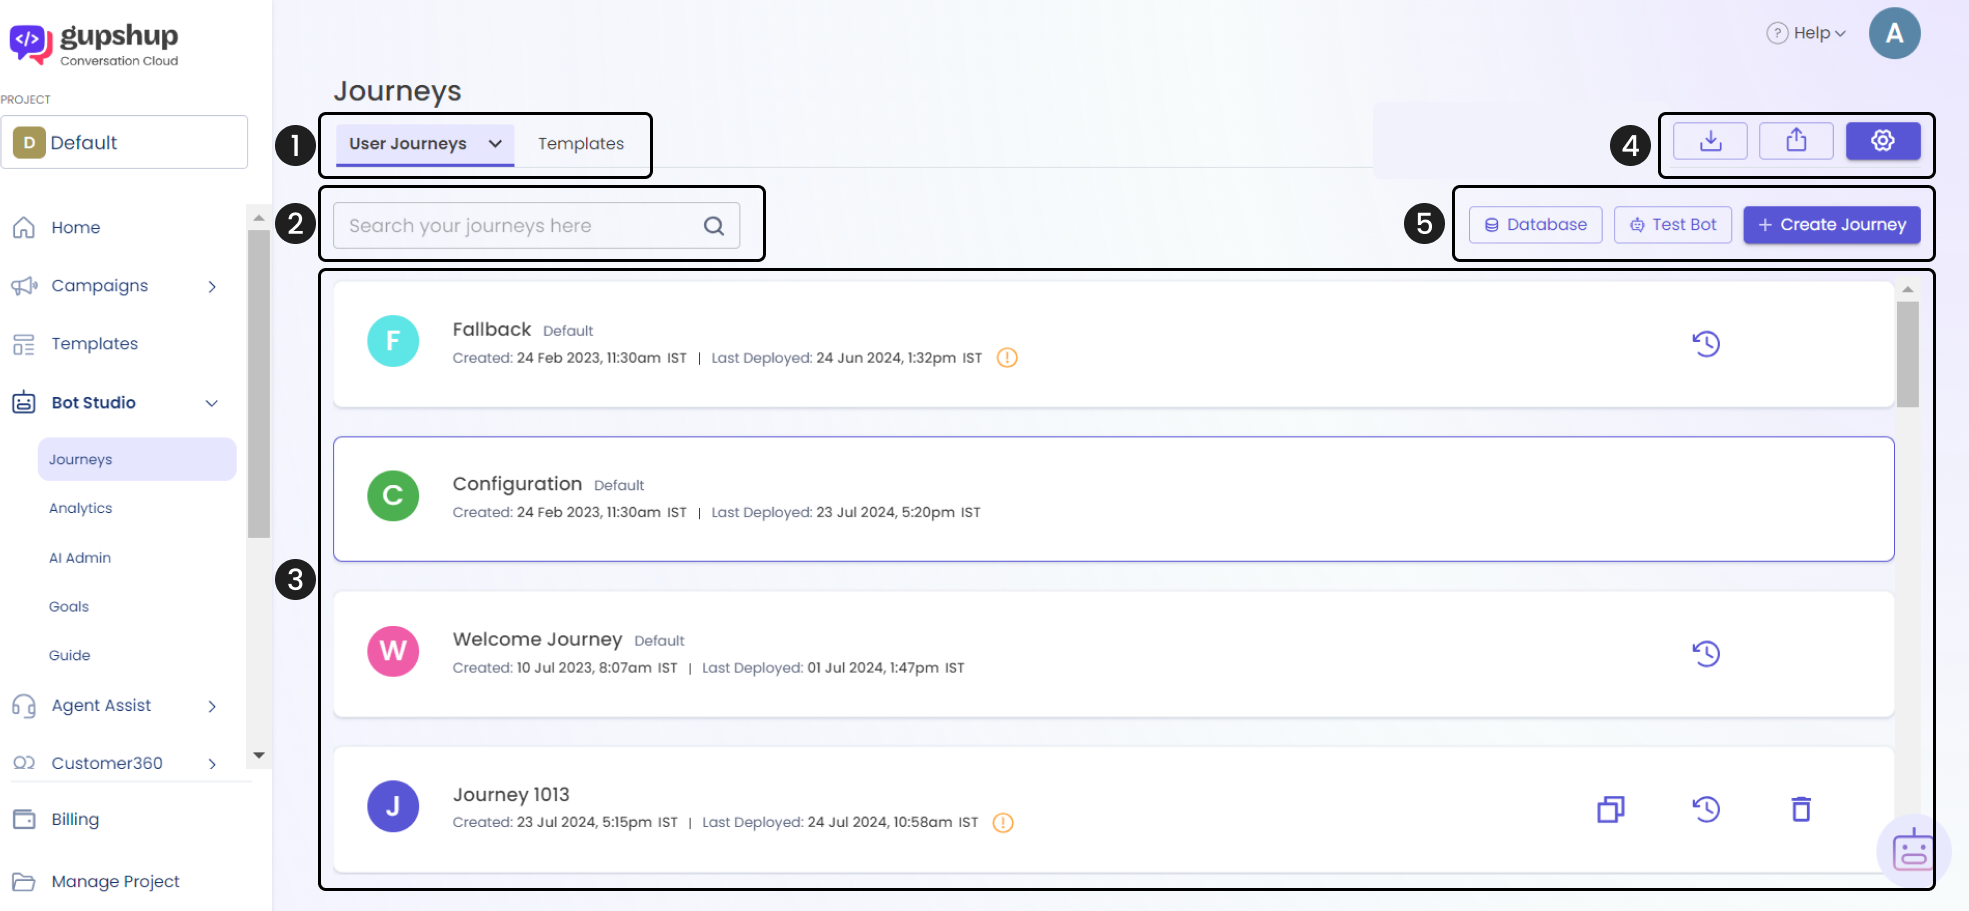
The Journeys Landing Page is your central hub to create, manage, and track conversational journeys built in Bot Studio. From here, you can access tools for building from scratch or using templates, importing/exporting journeys, and testing bots in real-time.
Key Sections on the Landing Page
-
Journey Type & Templates Dropdown
Select from different journey types:- User Journeys
- Ad Journeys
- Campaign Journeys
The templates panel is accessible here too (see Using Templates).
-
Search Bar
Quickly find your journeys by searching their names. -
Saved & Deployed Journeys
View journeys that are saved, deployed, or in progress—ordered by most recent save time. -
Import, Export & Bot Settings
- Import/export journey JSONs
- Access additional configurations via Bot Settings
-
Database (Dev Mode), Test Bot & Create Journey
- Database: Beta feature, available for Gupshup internal devs only
- Test Bot: Preview your journey (Web channel only; some WhatsApp-exclusive features may not work)
- Create Journey: Launch the builder to start crafting a new journey
Taking the Product Tour
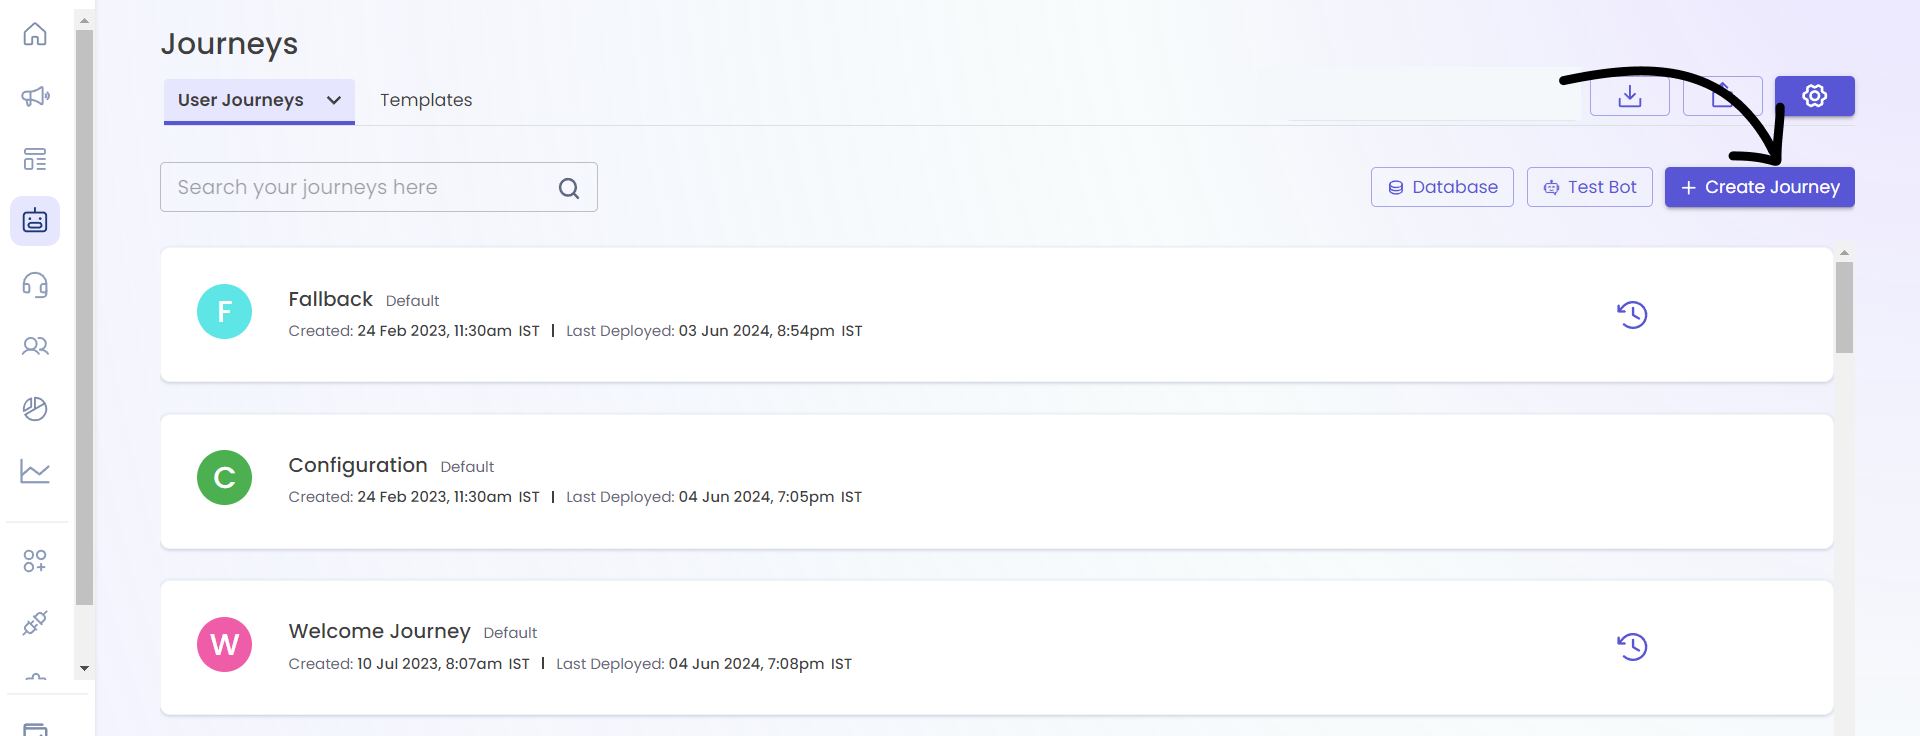
To start with an onboarding experience:
- Click the ‘Create Journey’ button on the landing page.
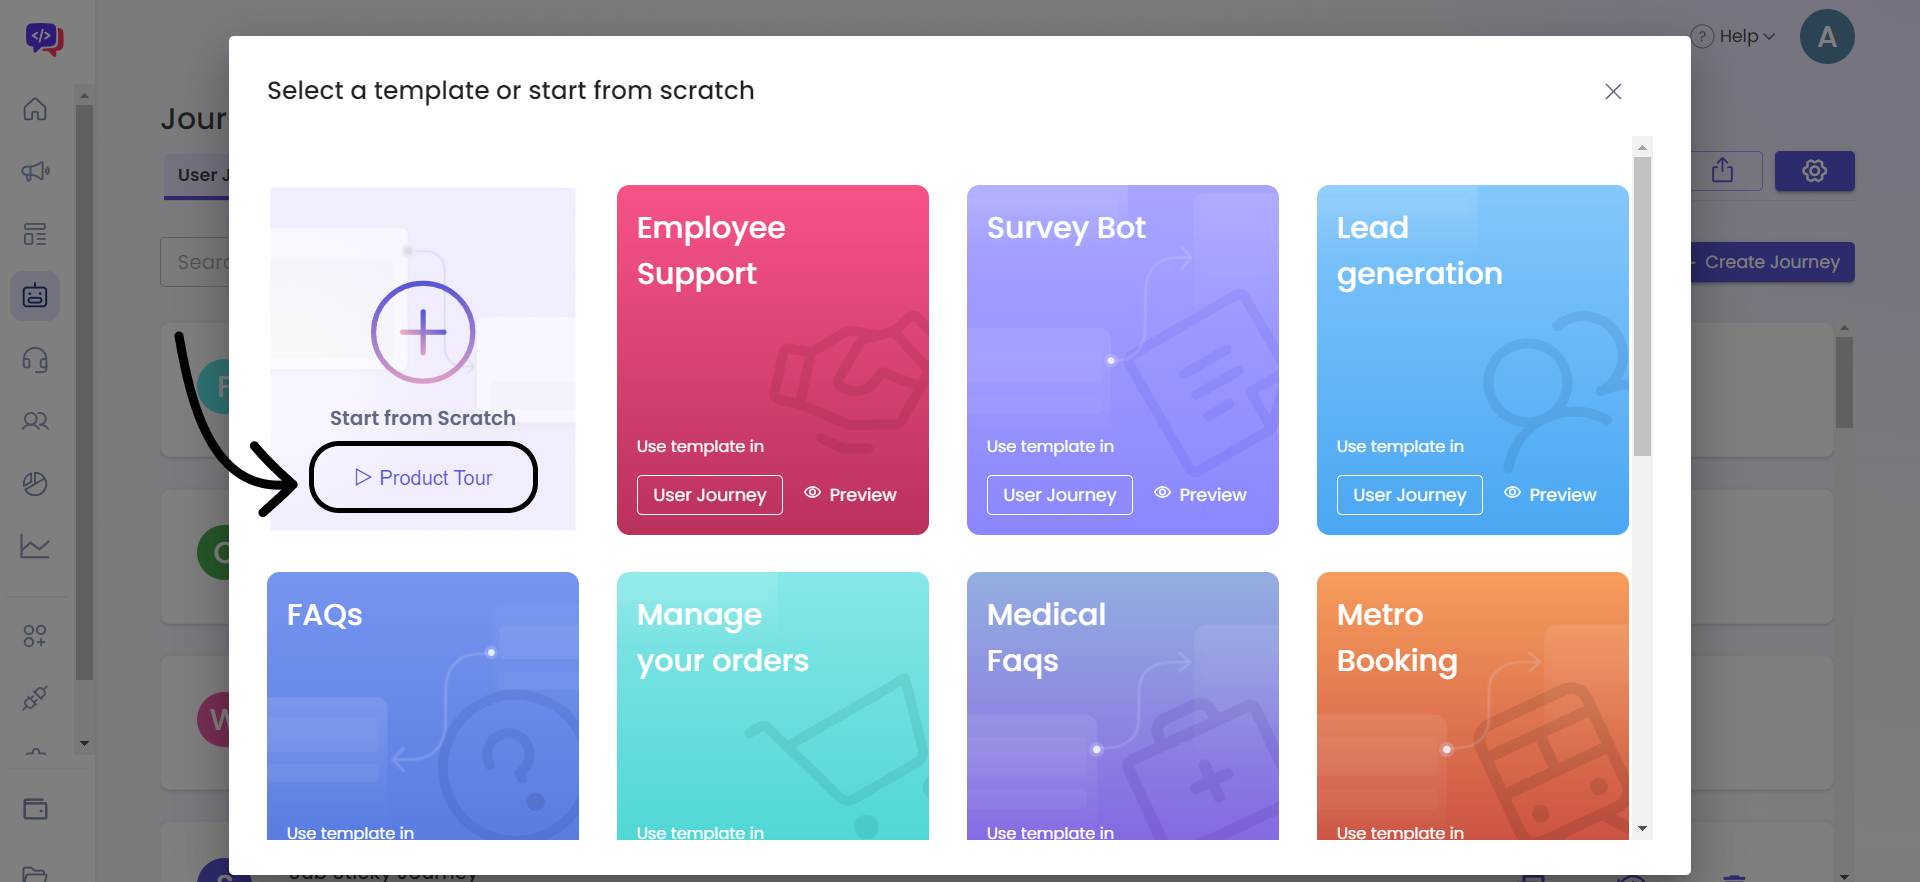
- In the pop-up, select “Product Tour” to begin the guided walk-through.
Step 1
Step 2
Create a New Journey from Scratch
To build a journey manually:
- Click ‘Create Journey’
- In the dialogue, choose “Start from Scratch”
- You will be redirected to the Journey Builder Canvas with a blank journey ready to edit

Step 1
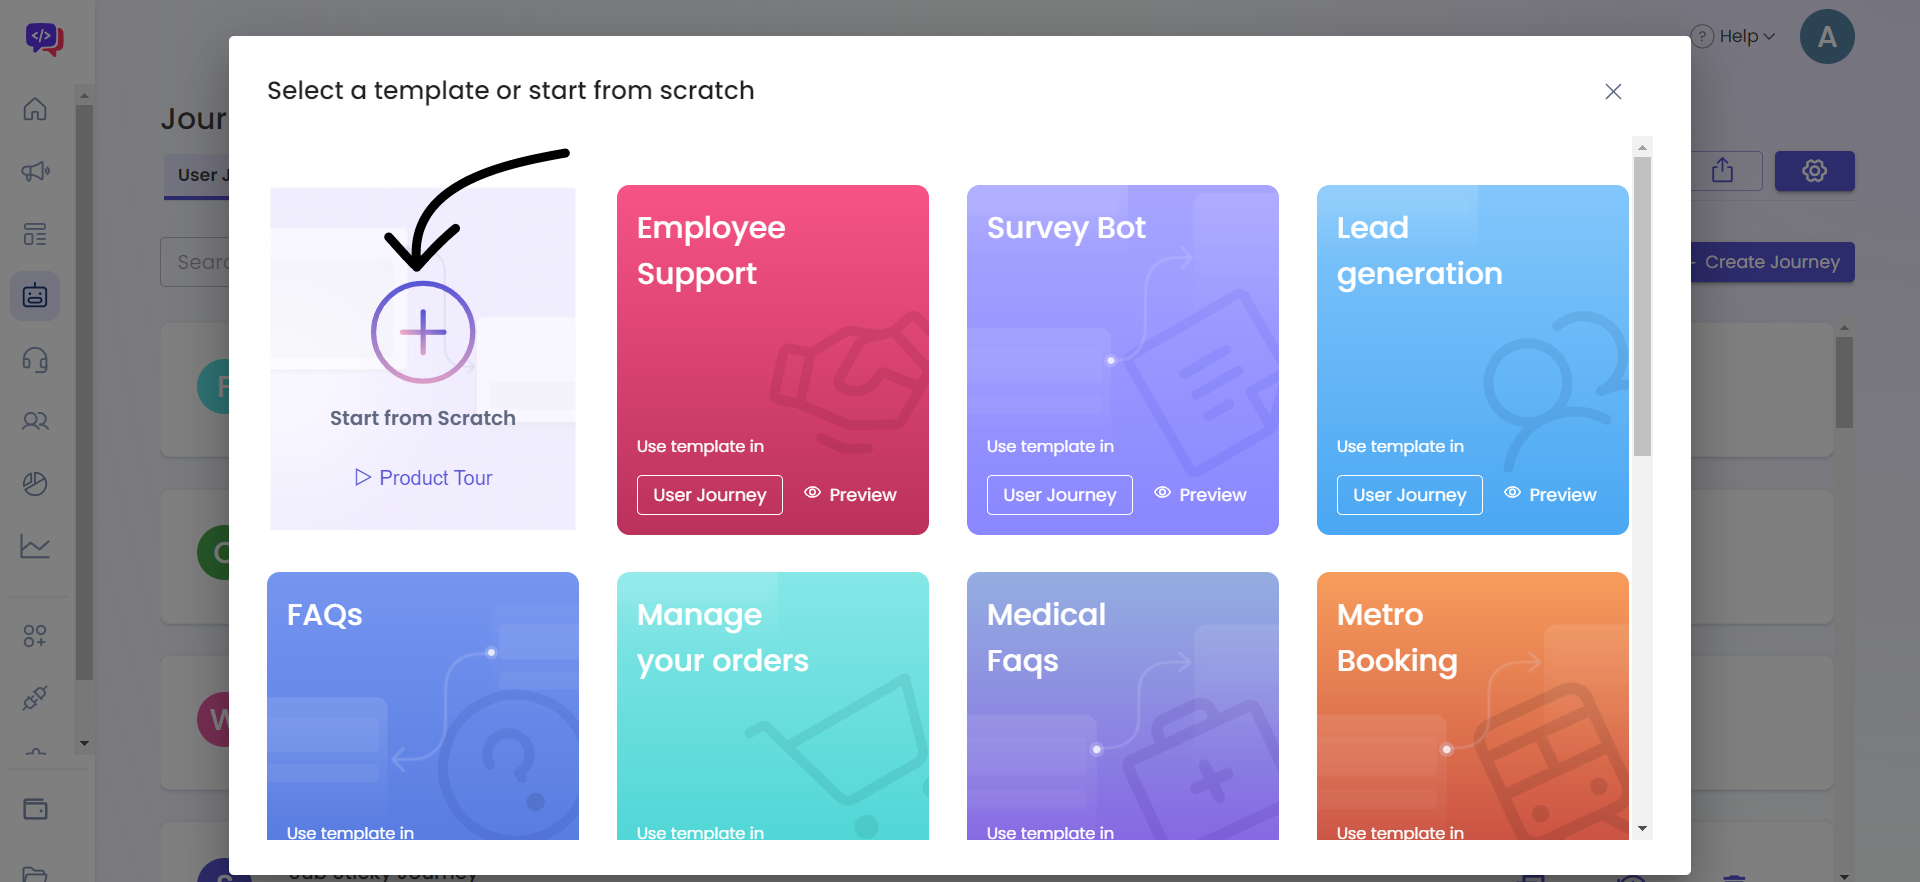
Step 2
And the journey builder will open with a new journey created.
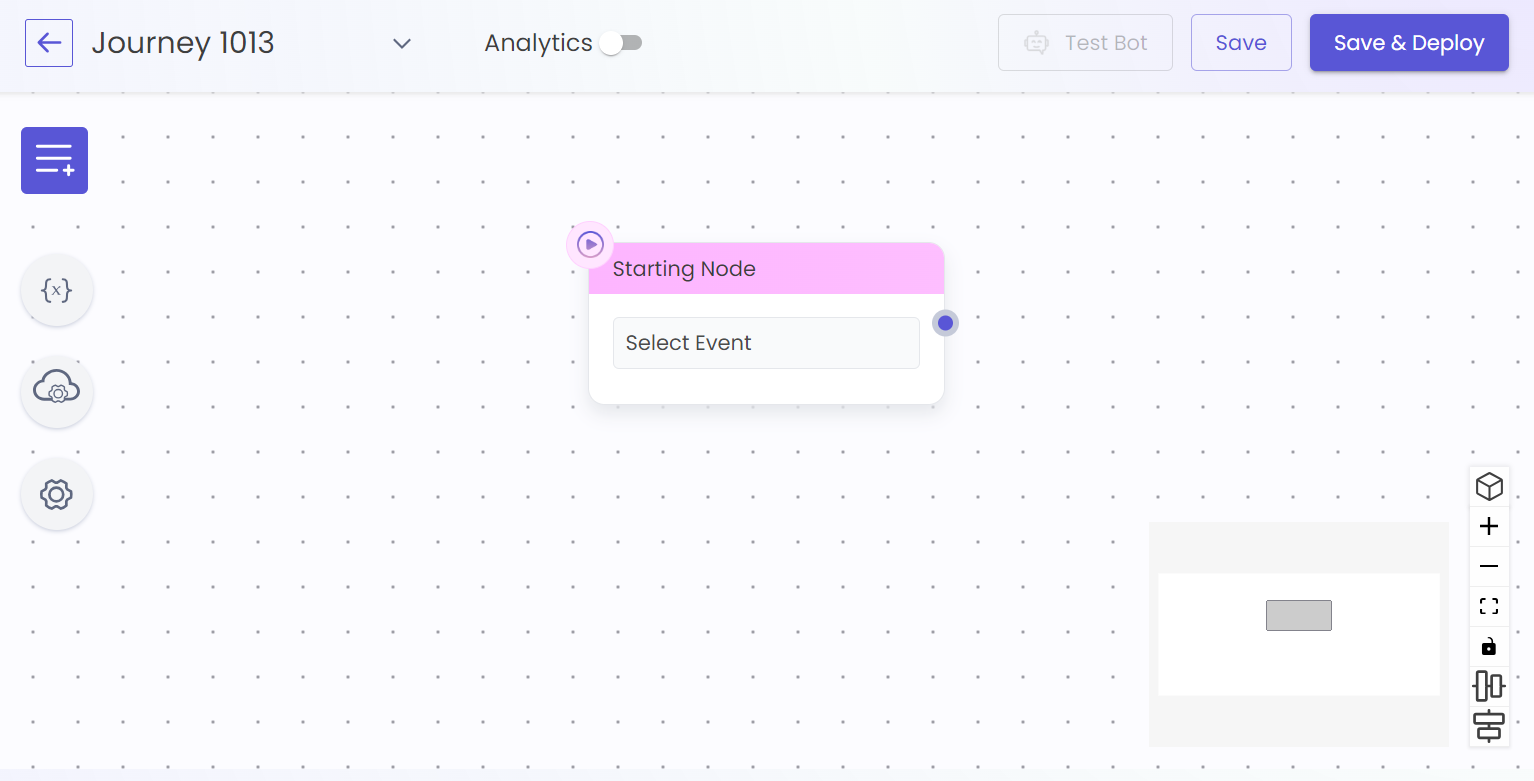
Journey Builder (New Journey)
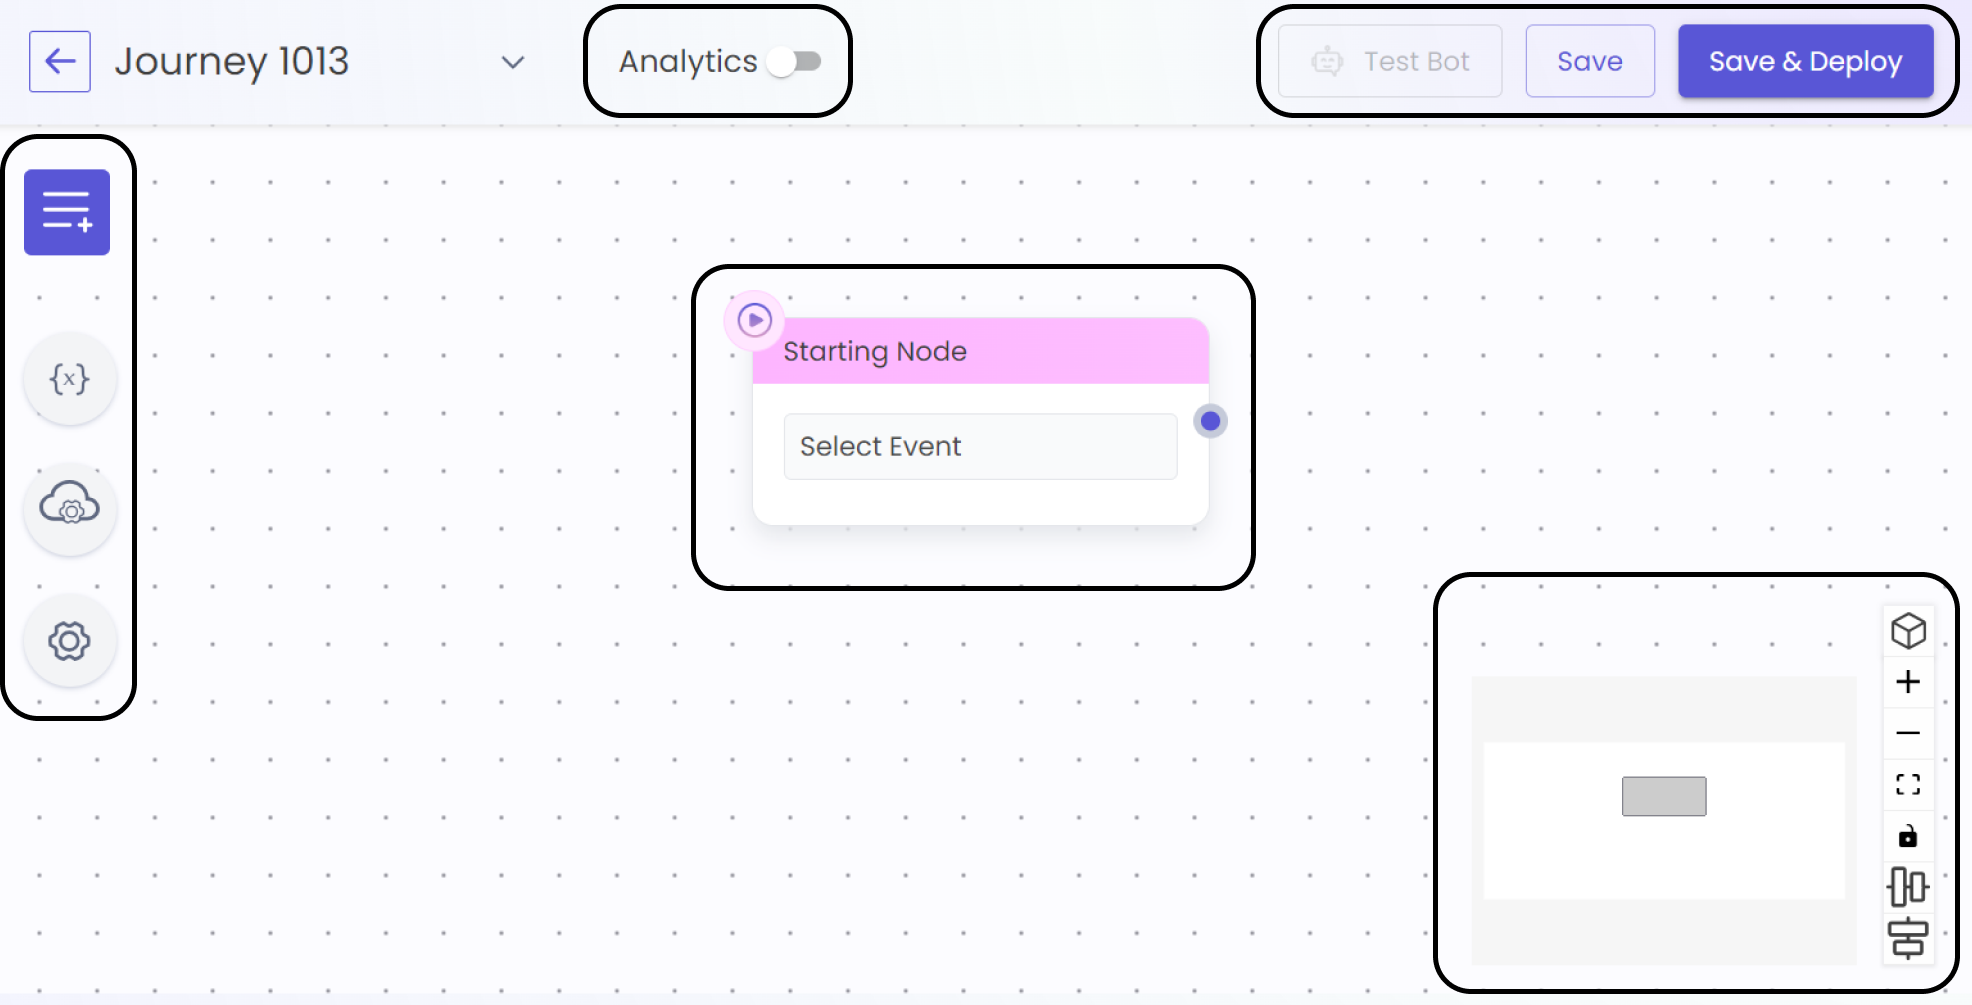
The journey builder tool has few major components which are shown below. We'll discuss about them one by one:
Side Options
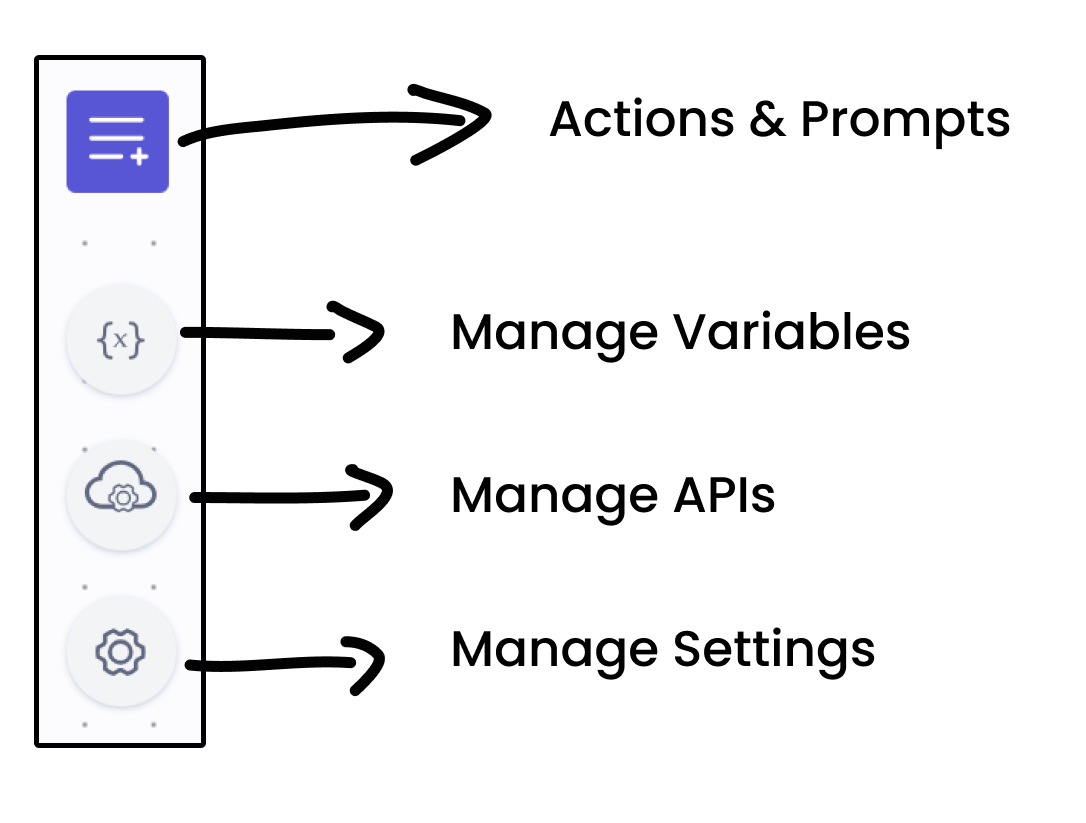
🔧 Side Panel Tools
- Actions & Prompts: Includes all message, action, and prompt nodes
- Manage Variables: Create & edit local/system/global variables
- Manage APIs: Add or import external APIs
- Manage Settings: Configure journey-level settings
🗺️ Mini-Map & Tools
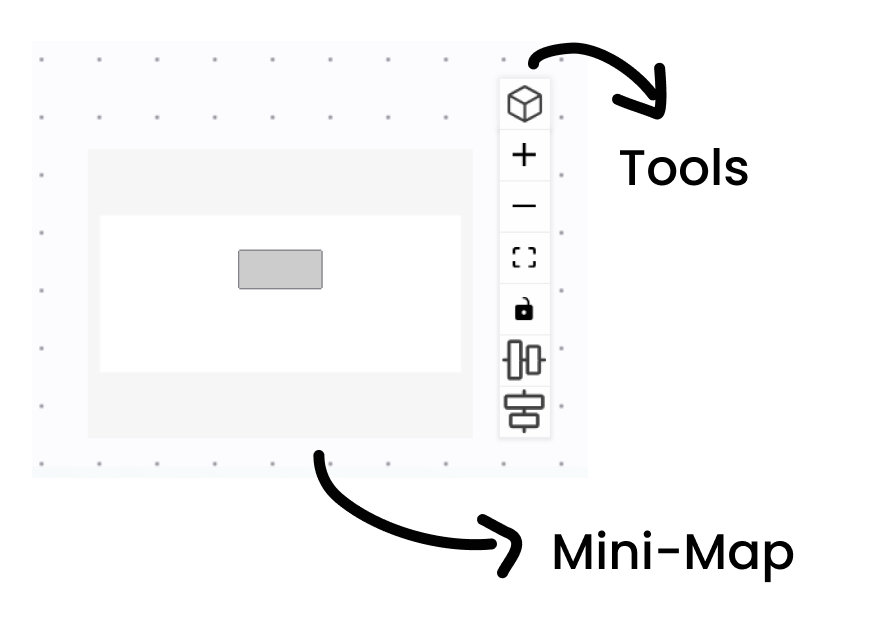
- Mini-Map: Visual indicator of your current view in the journey layout
- Canvas Tools:
- Zoom in/out
- Fit View
- Toggle Interactivity
- Organize blocks
- Align nodes horizontally/vertically
Starting Node
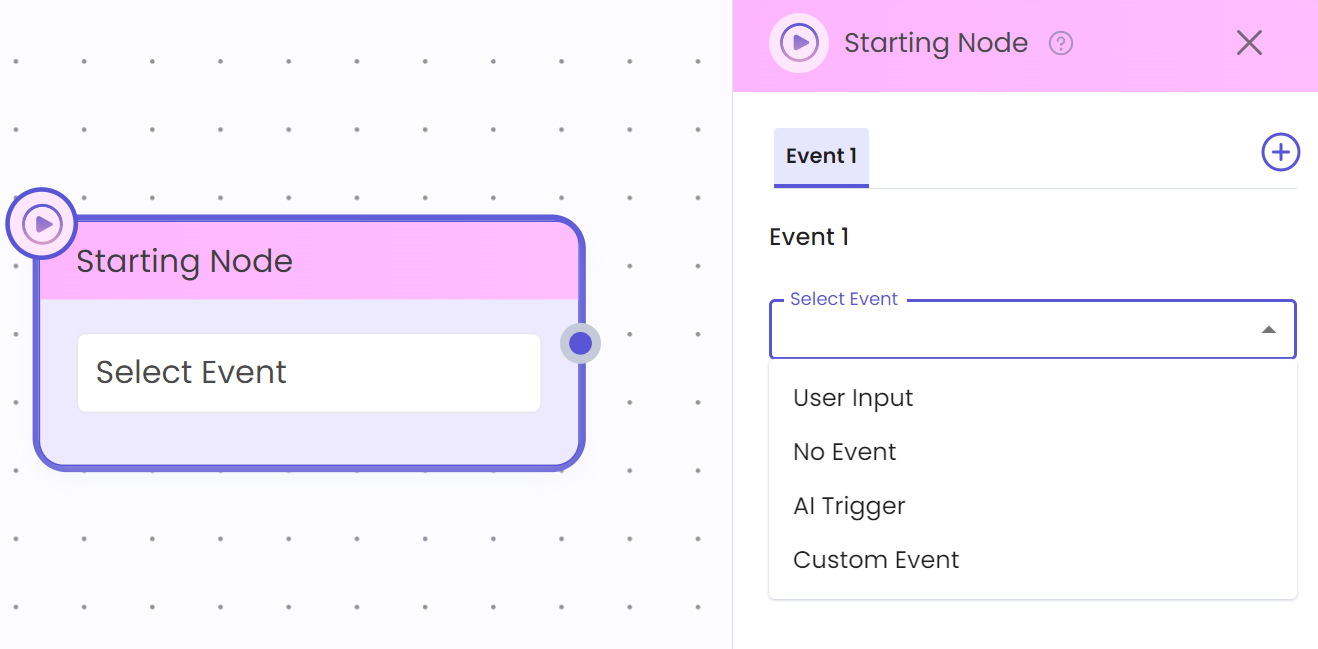
Each journey begins with a Starting Node, which acts as the trigger point. There are 4 possible types of triggers:
- No Event
- User Input
- AI Trigger (Intent-based)
- Custom Event / Callback URL
🔗 Learn more: Starting Node Docs
Test Bot & Saving options

Saving and Testing Journeys
- Save: Use this button to save progress frequently.
- Save & Deploy: Makes the journey live for production use.
- Test Bot: Lets you test the journey on the Web widget. Use it to validate message flows and payloads.
Note: Test Bot becomes available only after you Save & Deploy your journey.
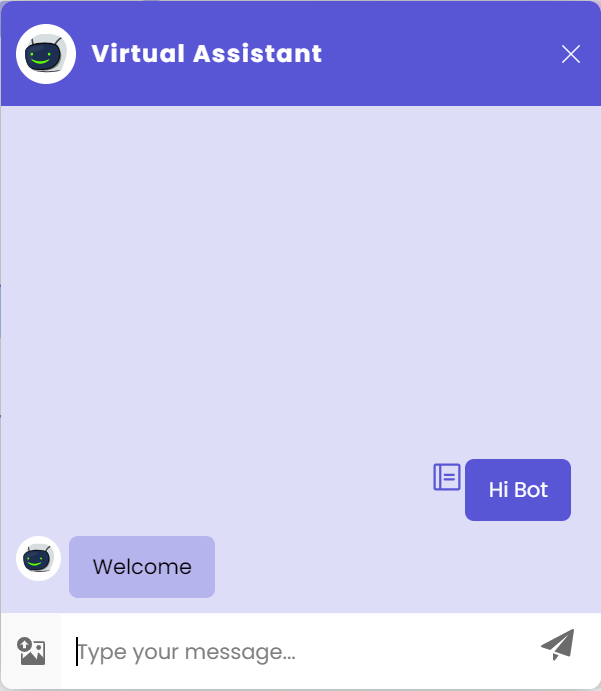
NOTE: You can use the Test Bot only after Saving and Deploying the journey
Analytics Toggle
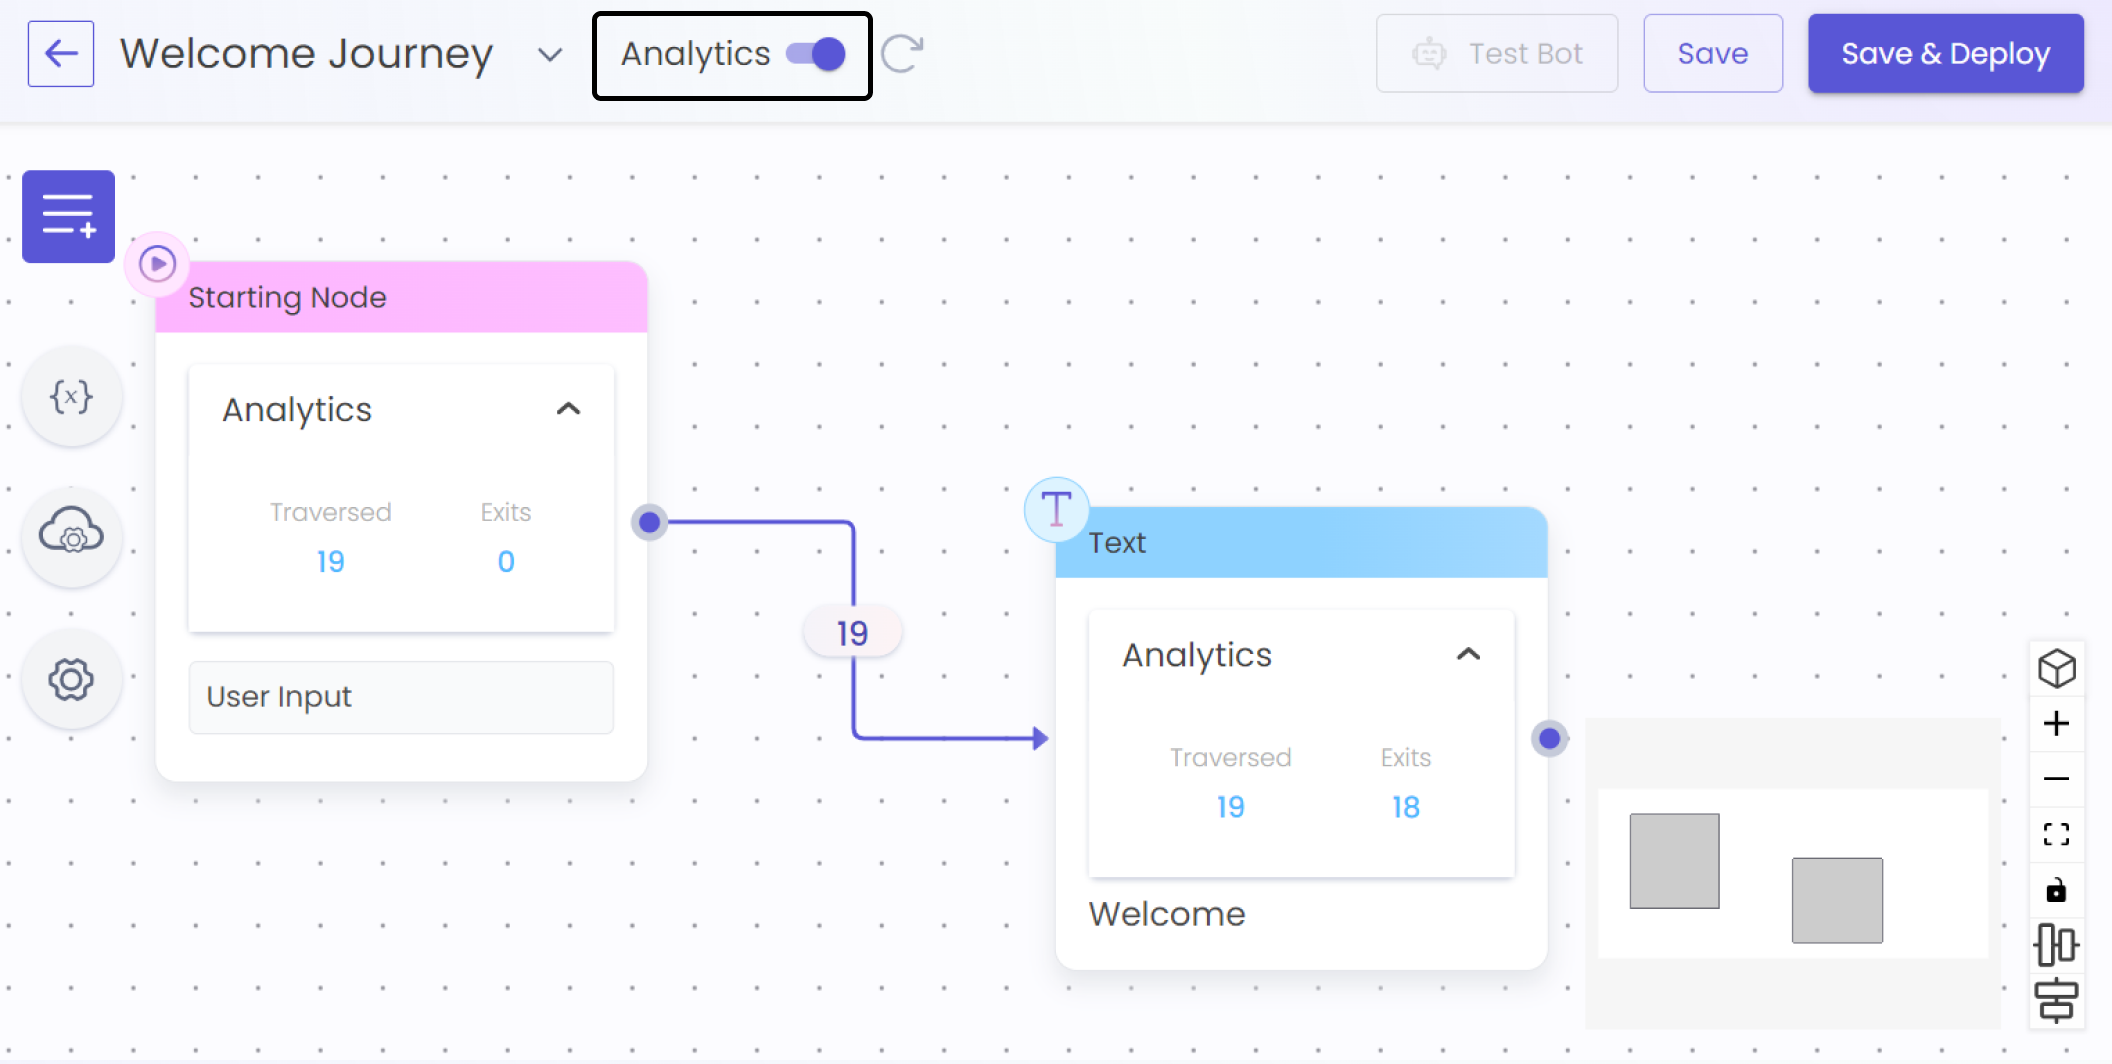
Analytics Toggle
Turn on the 'Analytics' toggle to get the inside stats of the journey flow. Stats are given for each node and their connecting lines.
Using the Templates
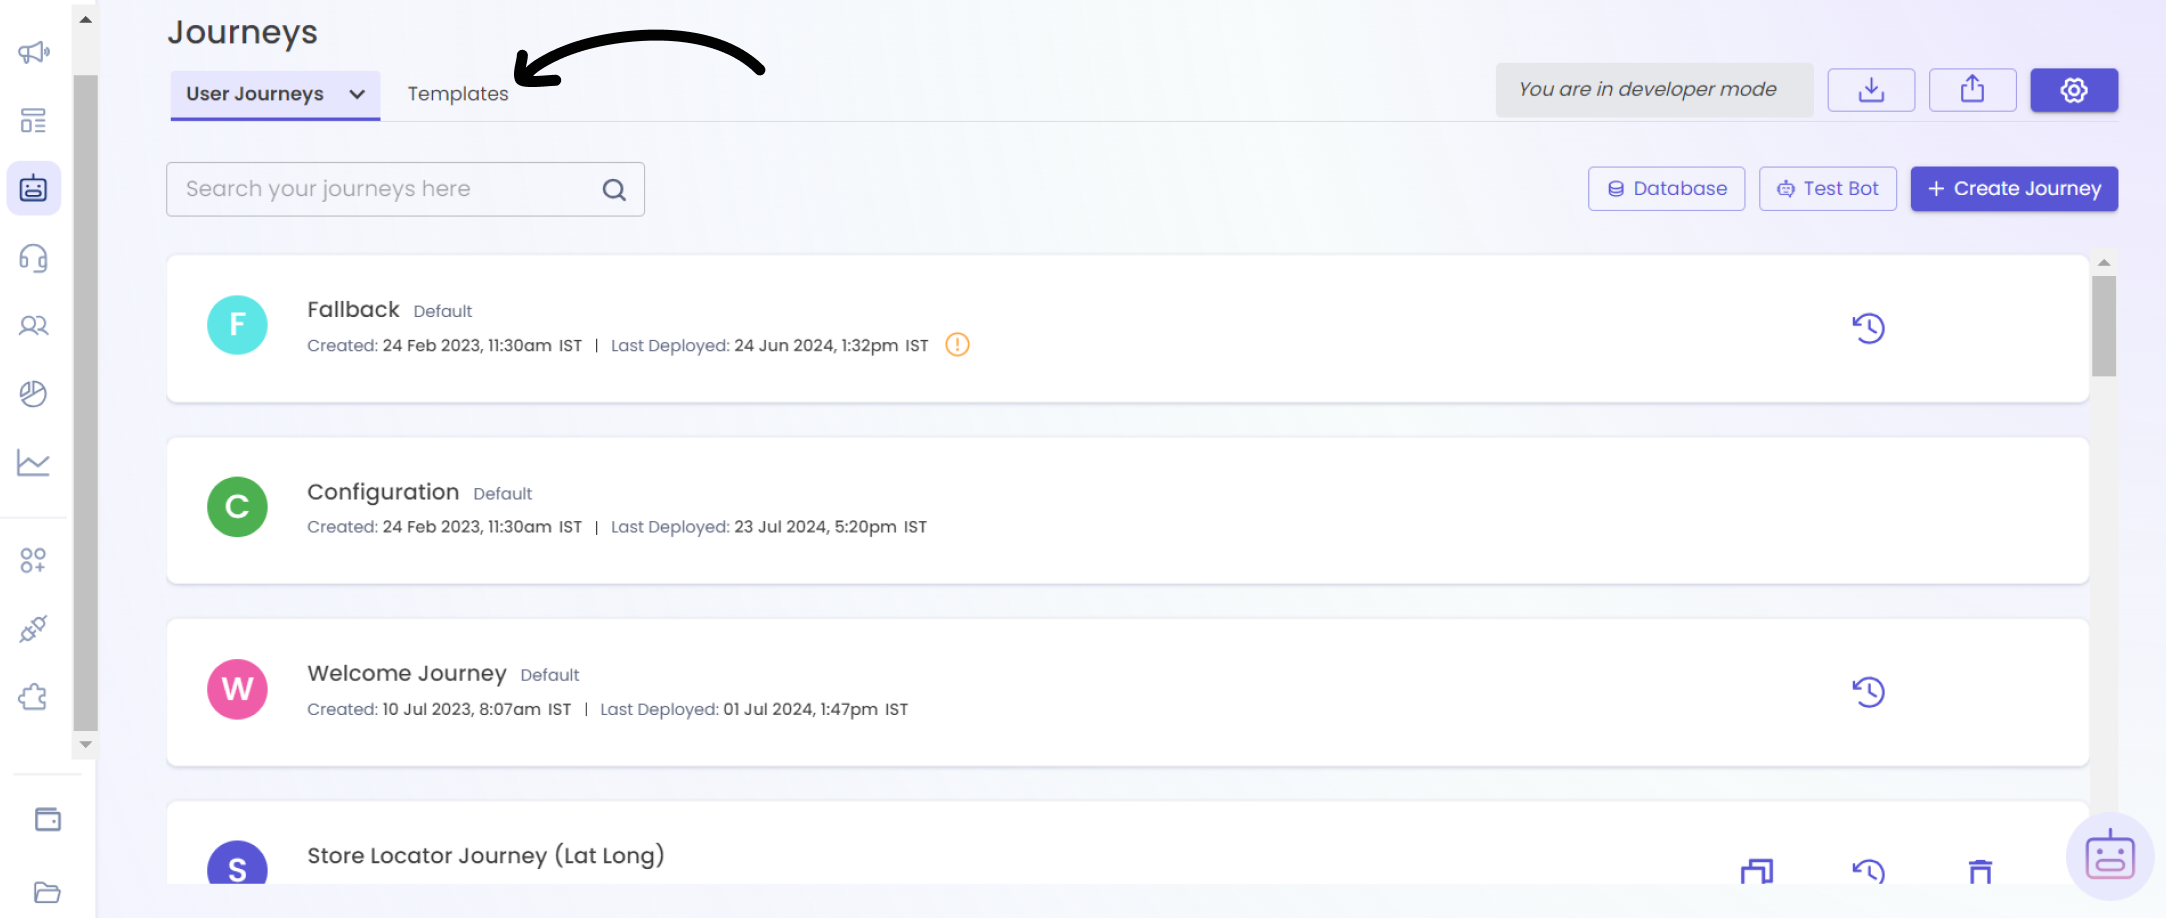
Step 1 - Templates Section
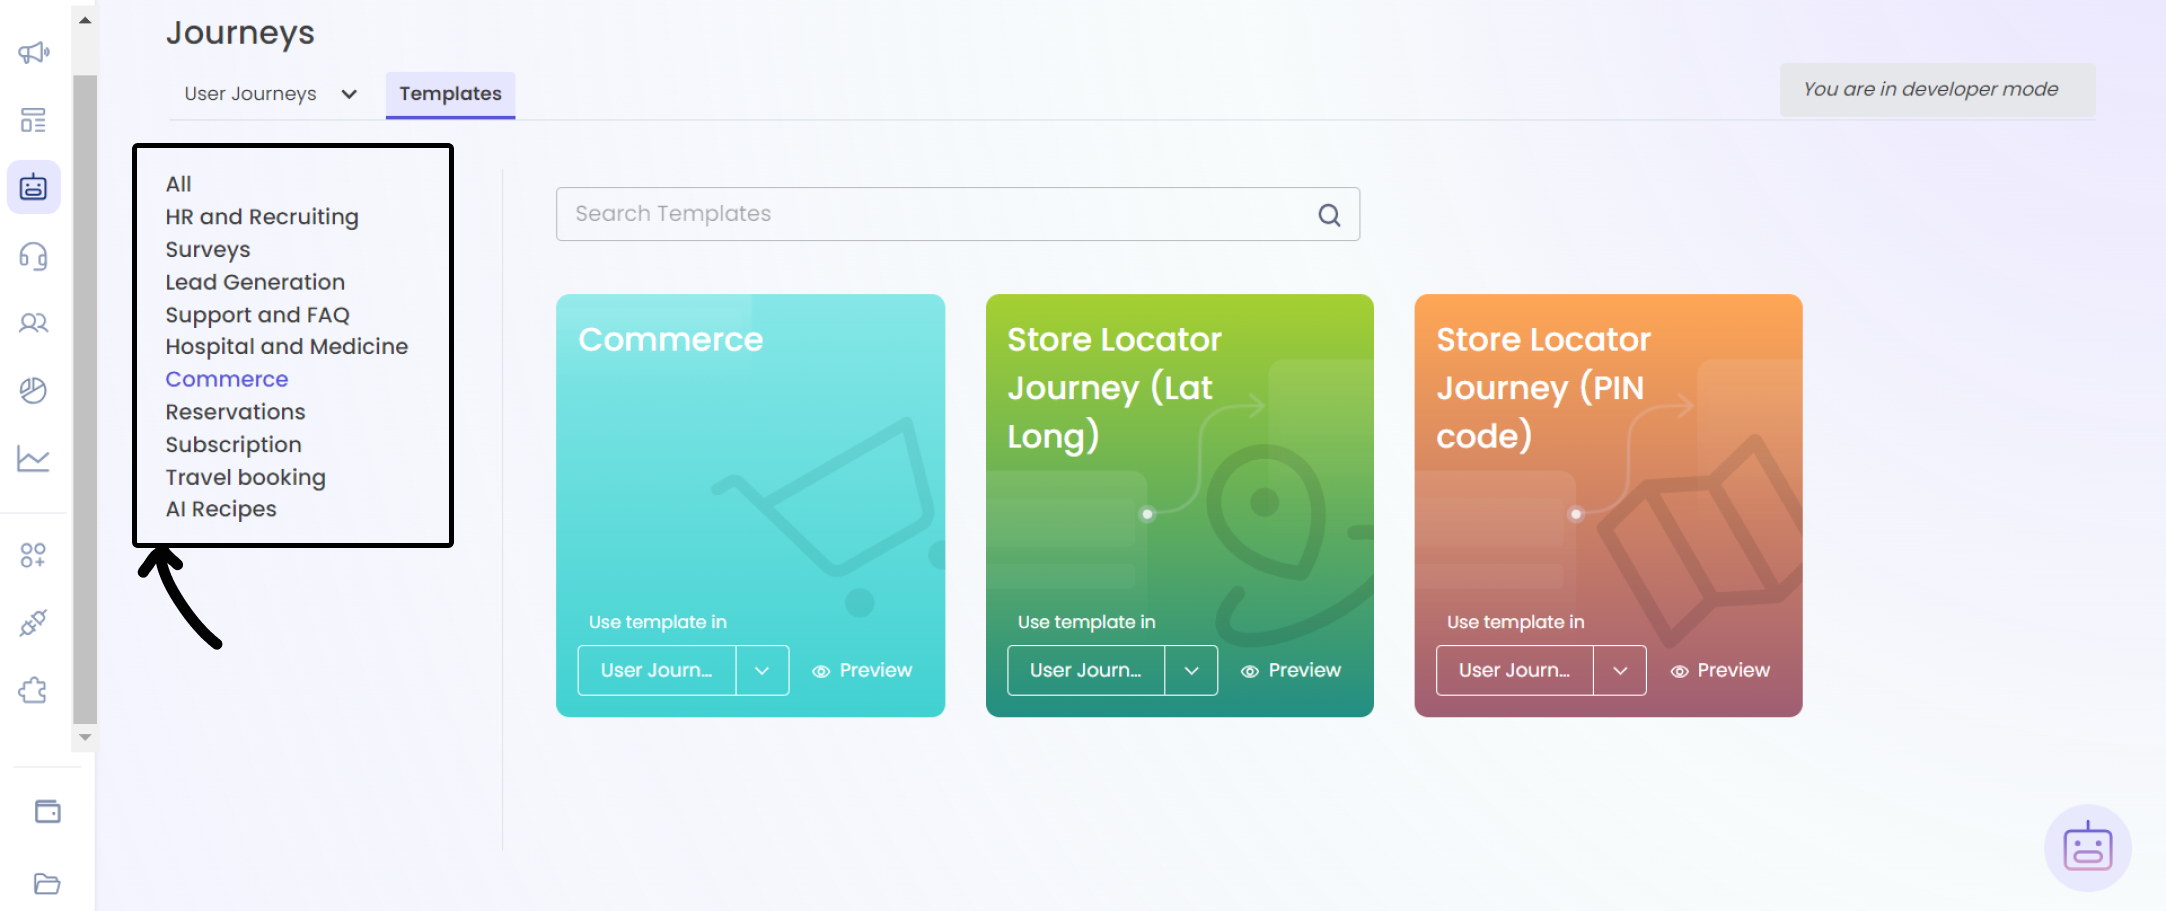
The Templates section provides users with access to pre-built journeys designed for generic scenarios. This allows users to quickly find a template that closely matches their specific use case and customize it to meet their needs.
Step 2 - Templates Categories
On the left side, the templates are arranged in categories. Choose the category you need and you'll see the templates of that category.
Users have two option on a template card:
Preview - Users have the option to preview a template to ensure it fits their requirements before using it.
Journey Type - From the drop down, you can select the journey type and start using the template. It offers two options - User Journey & Ad Journey
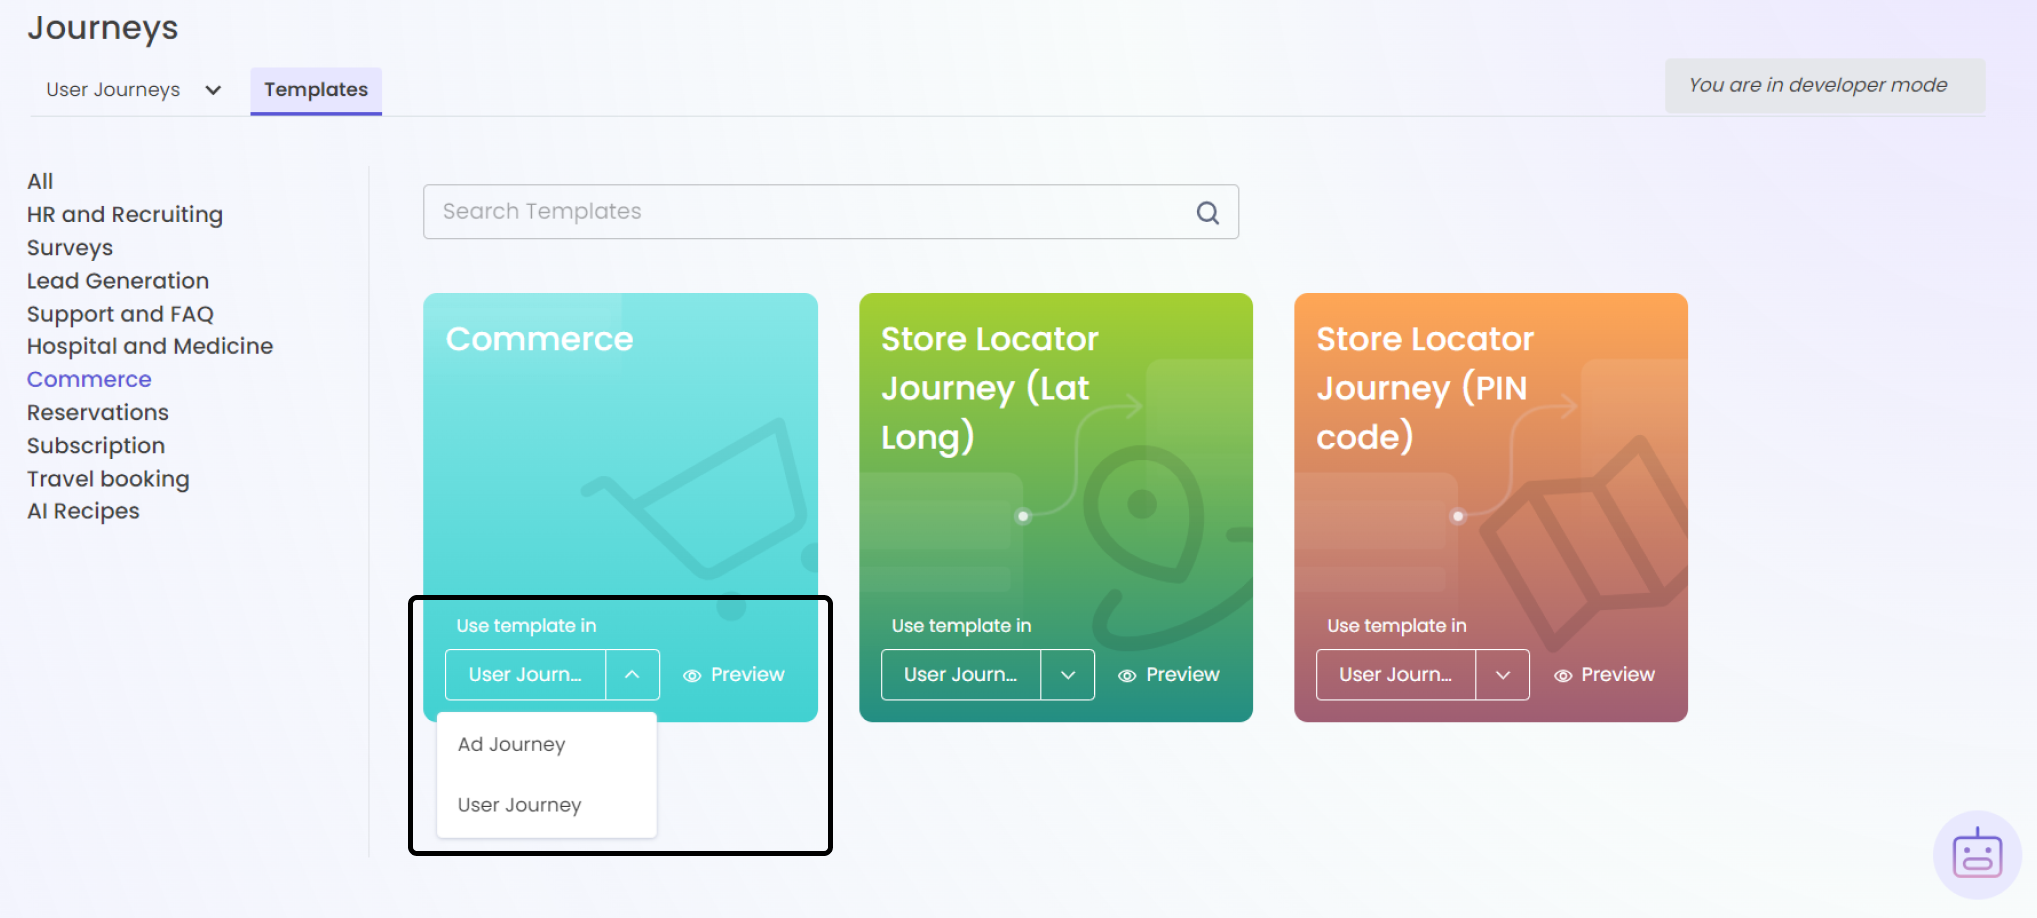
Preview or Use Template here
Updated 10 months ago