How to Create WhatsApp Static Flows
Creating a WhatsApp Static Flow involves several steps: designing the Flow JSON, setting up the journey, handling the response JSON, and triggering the flow from a user journey. Follow the steps below for a seamless setup:
Step 1: Create the Flow JSON
You can create the Flow JSON using either the Flow Builder UI or the Flow JSON Builder from Meta Business Manager (Meta BM):
OR
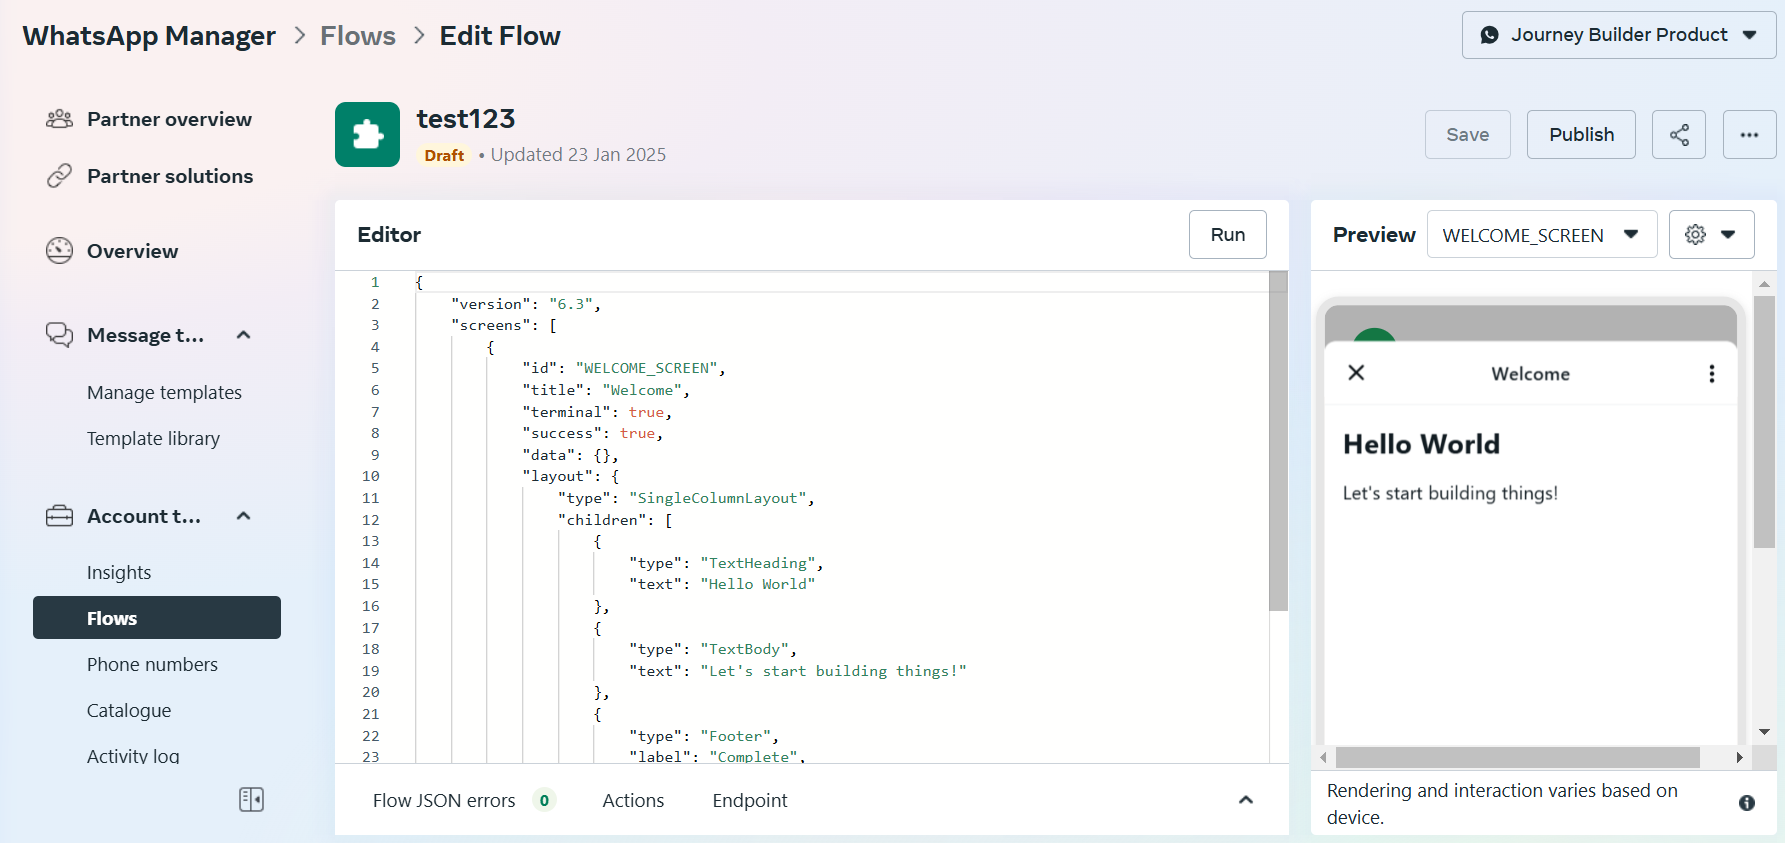
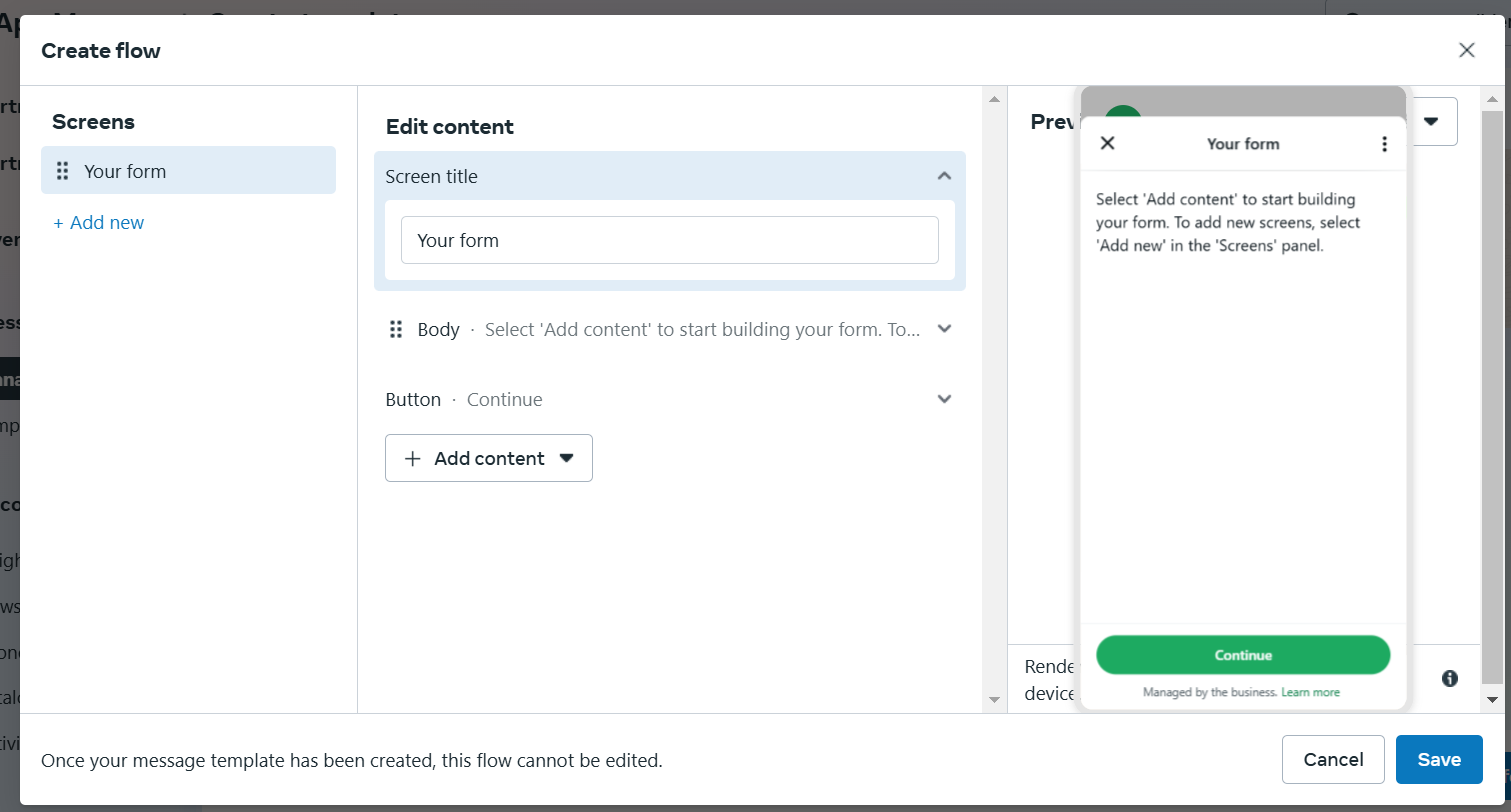
Using the Flow Builder UI:
Navigate to the Flow Builder via the Create Template Action on Meta BM
Design your flow by configuring the screens, layouts, and components directly using the intuitive UI.
The preview panel allows you to visualize the flow in real-time.
Step 2: Copy the Flow ID and Create a Journey
After finalizing the Flow JSON/Screens, you need to copy the Flow ID and refer it in a WhatsApp Flow journey:
Locate the Flow ID:
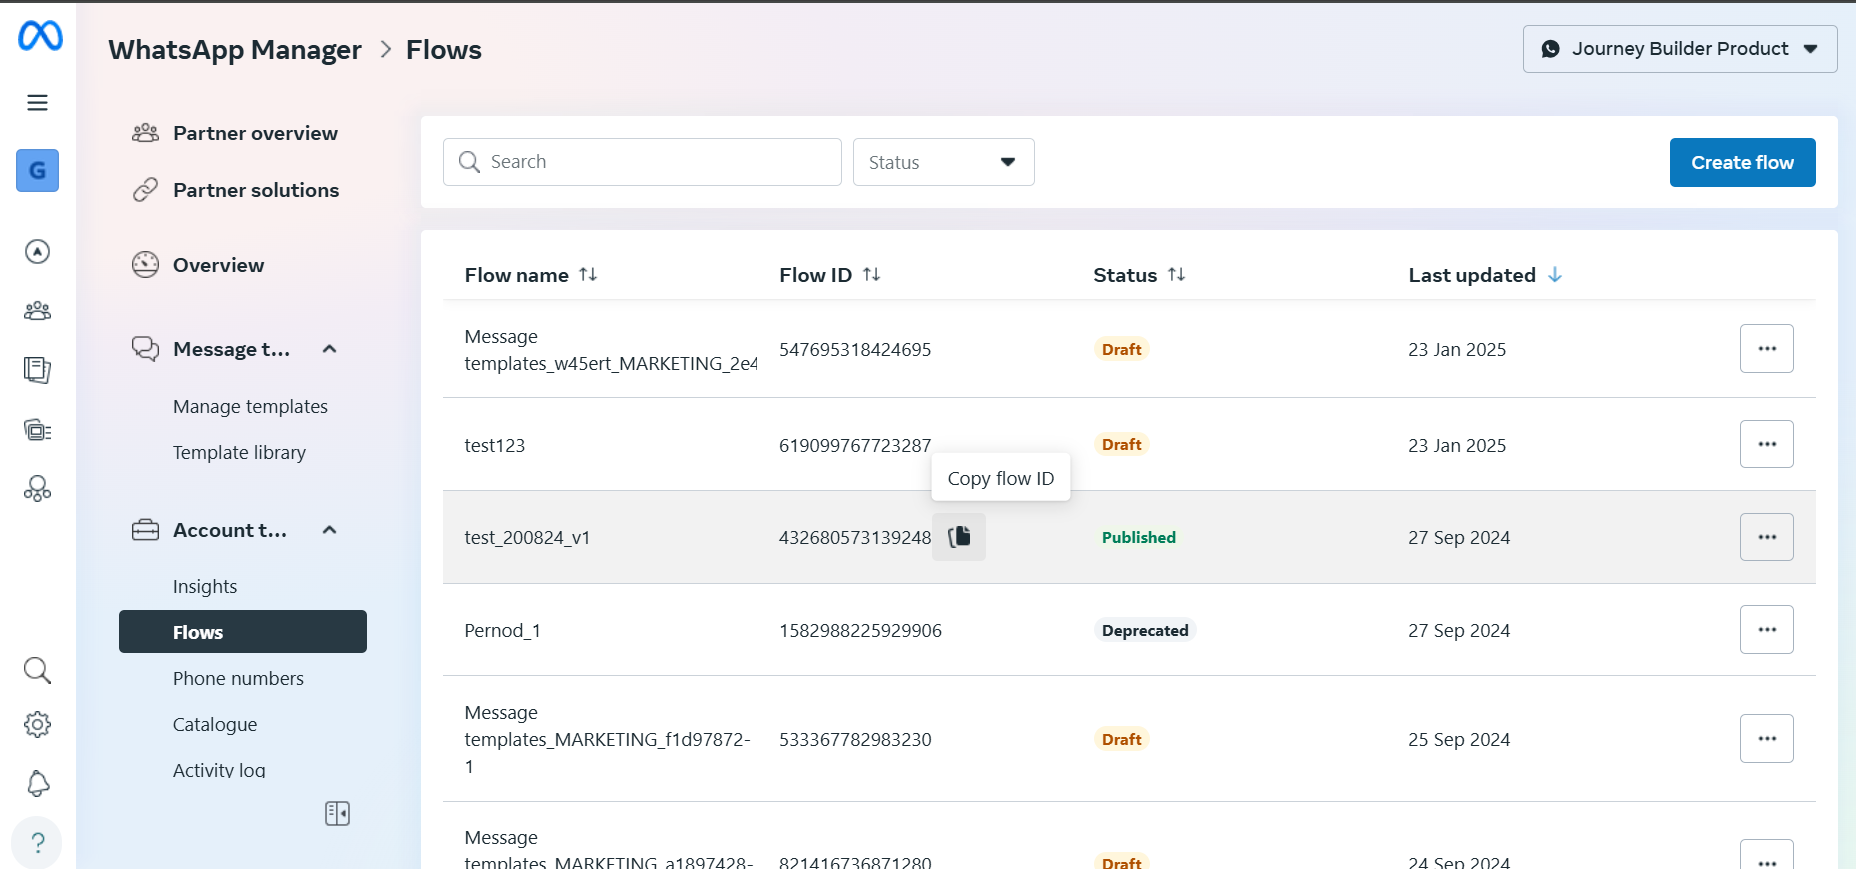
Navigate to the Flows section in Meta BM.
Find your created flow in the list and copy its unique Flow ID.
Create a WhatsApp Flow Journey:

Use the copied Flow ID to create a journey in the Bot Studio platform.
The Flow ID ensures seamless integration of the static flow into your WhatsApp messaging workflow.
Step 3: Parse the Flow Response
The flow journey is the point where the flow response lands once the user submits the flow.
Based on the Flow JSON created, the bot designer has to identify the response JSON that will be received from Meta upon flow submission.
The flow response will be saved in the system variable message_metadata JSON variable. This can be parsed to access the attributes for each component the user has interacted with.
Here’s a sample payload of a submitted flow response:
{
  "screen_3_TextArea_0": "Excellent ",
  "screen_2_RadioButtonsGroup_0": "0_Yes",
  "screen_2_RadioButtonsGroup_1": "0_Yes",
  "screen_2_TextArea_2": "E-Retail ",
  "screen_1_RadioButtonsGroup_0": "0_5",
  "screen_1_TextInput_1": "John",
  "screen_1_TextInput_2": "[[email protected]](mailto:[email protected])",
  "flow_token": "d2FmbC9maWQvMTYyNTAzMDI4NDk0NDQ5Ni93YWJhL3VuZGVmaW5lZC9jaWQvOTE4NzIzMDYyMjY1L2ZtaWQvMTczNzEwMTc0MTA3Mz9kYXRhPSIi"
}
In this example:
The keys like screen_1_TextInput_1 represent the unique IDs of components in the flow.
The values (e.g., "John") correspond to the user’s input.
Step 4: Configuring the Terminal Node (Mandatory)
It is required to configure the Terminal Node on the WhatsApp Flow Journey at the end of the journey to ensure that the user gets an acknowledgment or is routed to the next user journey once the flow is submitted.
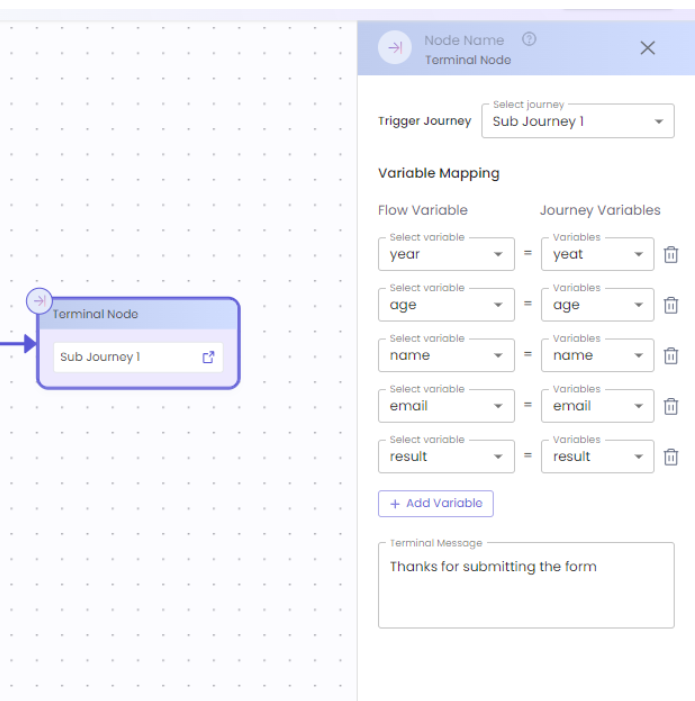
The Terminal Node consists of optional parameters that can be configured to handle the post-flow submission action:
Trigger Journey: Bot designers can configure to trigger a User Journey by passing the Flow Variables to a different journey and continue the conversation with the same context. There is also a provision to map the variables of the User Journey to those of the Flow Journey to pass the Flow response values.
Terminal Message: Designers can choose to just send an acknowledgment message to the end user post-submission of the form using the optional Terminal Message. This allows bot designers to complete the Flow within the Flow Journey if the data is already sent to client CRM or other Databases using the API and Code node.
Step 5: Triggering the Flow from a User Journey
To trigger the WhatsApp Flow from a user journey, bot designers must use the WhatsApp Flow Node at the point where the flow needs to be sent:
Add the WhatsApp Flow Node:
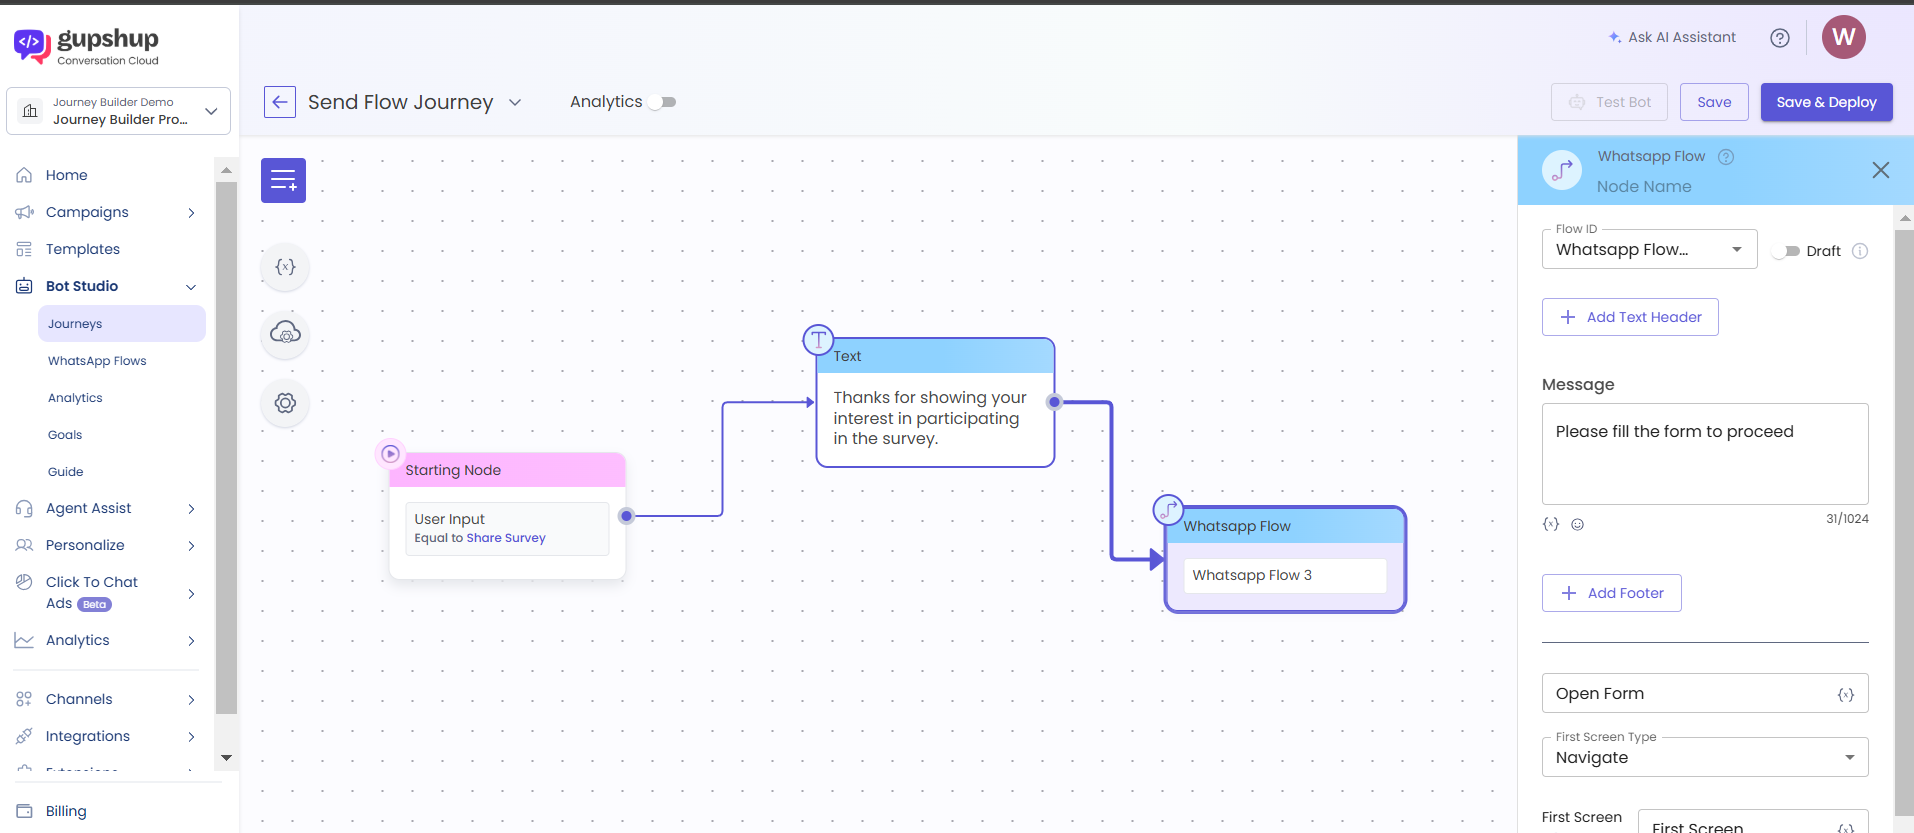
Drag and drop the WhatsApp Flow Node onto the Journey Canvas
Select the Flow Journey:
In the dropdown on the node, select the WhatsApp Flow Journey configured in the previous step.
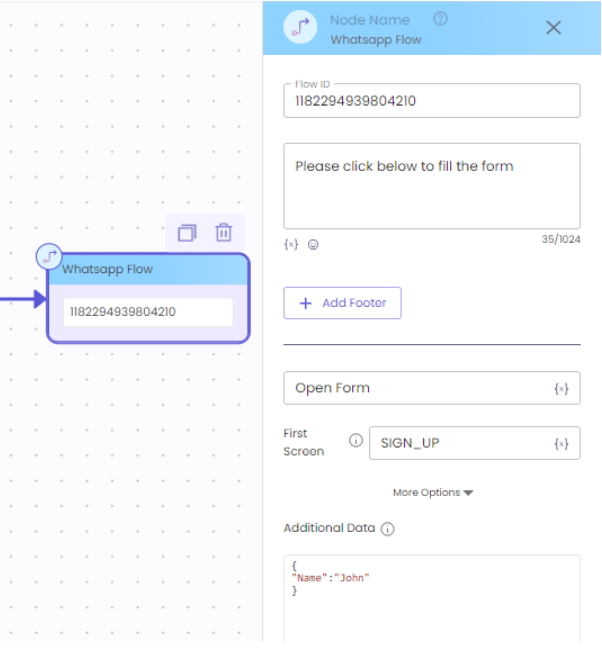
The following fields are available in the WhatsApp Flow Node:
Flow ID: This is generated in the Business Manager after drafting a WhatsApp Flow. The dropdown displays the available Flow IDs once the Flow Journey is created.
Draft Toggle: Use this toggle to test Flow IDs in draft state on Meta BM (not yet published).
Message: Add a free-form message to accompany the Flow CTA Button, informing the user about the flow.
Footer: Add an optional footer message if required.
Button Title: Define the title of the CTA Button displayed in the WhatsApp application.
First Screen Type: Select between 'Navigate' or 'Data Exchange' based on the Flow type (Static or Dynamic).
First Screen: Provide the ID of the screen to be shown first to the user. This allows businesses to customize the starting point of the flow for different end-users. (Not applicable for Dynamic Flows)
Additional Data(optional): Pass key-value pairs for flow_action_data in the Flow JSON. This can be used to send additional information for the first screen. (Not applicable for Dynamic Flows). Make sure that the Flow JSON is configured properly to use the flow_action_data in the first screen. For More Details: Visit Meta Doc
Step 6: Using the flow response data
The flow response data is stored on the message_metadata system variable and can be used to refer to the values submitted for each inputs done by the user. For example if you need to use the above sample Flow Submit JSON to use on a confirmation message to the user, you can do the following on the Text node
Flow Response Payload received on the variable:
{
  "screen_3_TextArea_0": "Excellent ",
  "screen_2_RadioButtonsGroup_0": "0_Yes",
  "screen_2_RadioButtonsGroup_1": "0_Yes",
  "screen_2_TextArea_2": "E-Retail ",
  "screen_1_RadioButtonsGroup_0": "0_5",
  "screen_1_TextInput_1": "John",
  "screen_1_TextInput_2": "[[email protected]](mailto:[email protected])",
  "flow_token": "d2FmbC9maWQvMTYyNTAzMDI4NDk0NDQ5Ni93YWJhL3VuZGVmaW5lZC9jaWQvOTE4NzIzMDYyMjY1L2ZtaWQvMTczNzEwMTc0MTA3Mz9kYXRhPSIi"
}
Sample Text Node Payload to use the response data to verify the inputs with the user post submission:
Thanks for sharing the detail. Your submitted form response are as below:


Name: {{var_system.message_metadata.screen_1_TextInput_1}}

Email: {{var_system.message_metadata.screen_1_TextInput_2}}

Rating Provided: {{var_system.message_metadata.screen_2_RadioButtonsGroup_0}}

Knows about Flows: {{var_system.message_metadata.screen_2_RadioButtonsGroup_1}}

Customer Ask: {{var_system.message_metadata.screen_2_RadioButtonsGroup_0}}

Customer Name: {{var_system.message_metadata.screen_2_TextArea_2}}

Feedback(optional): {{var_system.message_metadata.screen_3_TextArea_0}}
By following these steps, you can design, implement, and deploy WhatsApp Static Flows seamlessly for your business requirements.