Autoresponders
Autoresponders on Instagram are single message replies that a business can send to a user if they:
- Comment on the business's post or reel
- Reply or react to the business's story
- Mention the business's Instagram handle in their own story
- Comment on the business's boosted and sponsored posts
- Comment on the business's IG Live stories
By default, autoresponders are enabled once you go live with Instagram. You have to follow the steps below if you wish to disable them.
- For new conversations, the user will enter the Welcome Journey.
- For existing/ongoing conversations, the user will enter the Fallback Journey.
Customizing / Disabling Autoresponders
Creating a handling journey for Autoresponders
- Go to Journeys under Bot Studio and click the Create Journey button.
- Choose the Start from Scratch option.
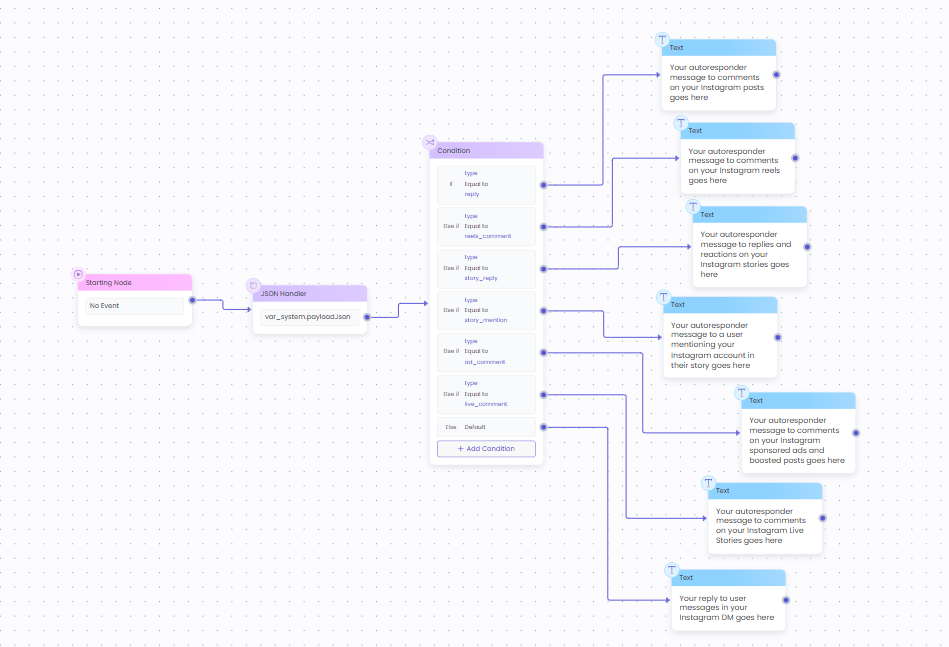
Sample Autoresponder Handling Journey
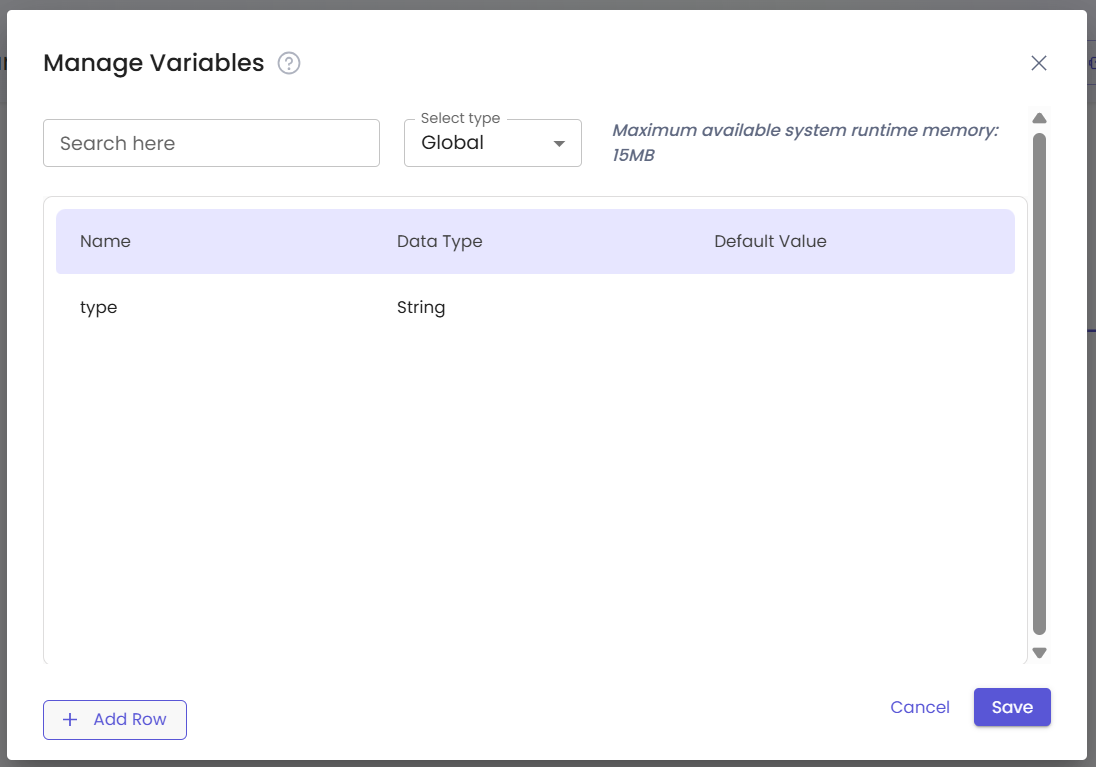
- Go to Manage Variables by clicking the {x} icon of the left on the canvas and select "Global" from the dropdown.
- Click the Add Row button and create a "String" type variable named "type".
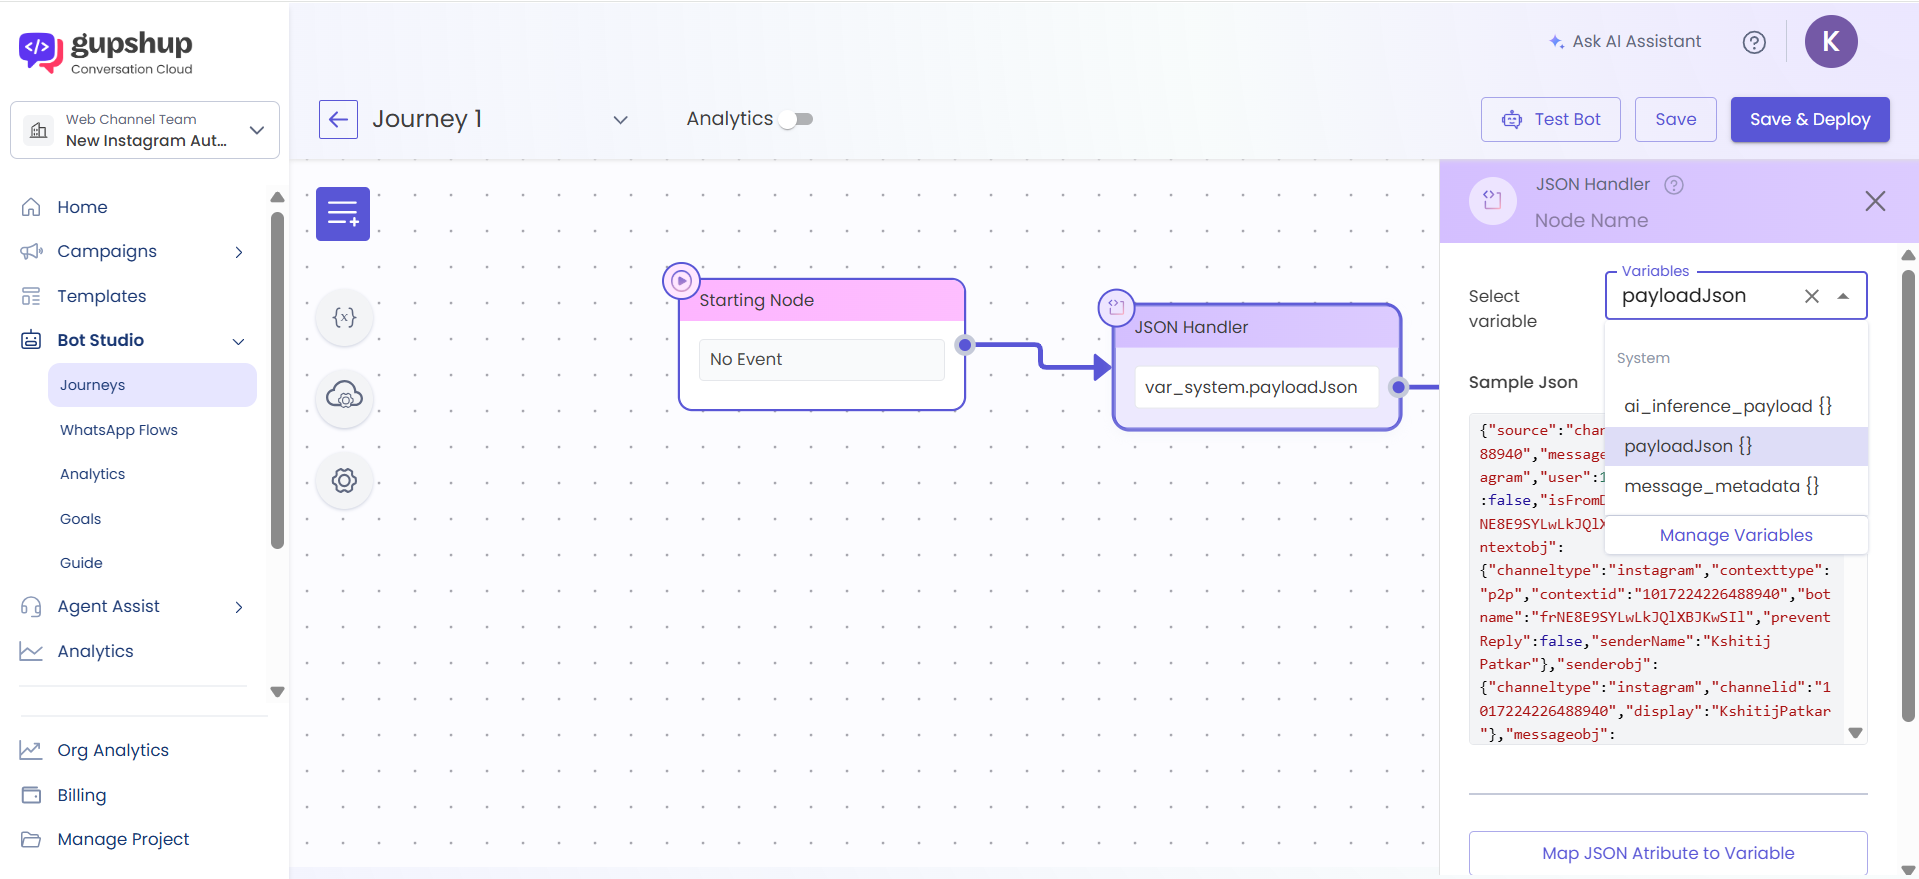
- Select the event in the Starting Node as "No Event".
- Add a new Action node called JSON Handler after the Starting Node.
- Select the system variable named "payloadJson " from the Select variable dropdown.
- Click the MAP JSON Attribute to Variable button.
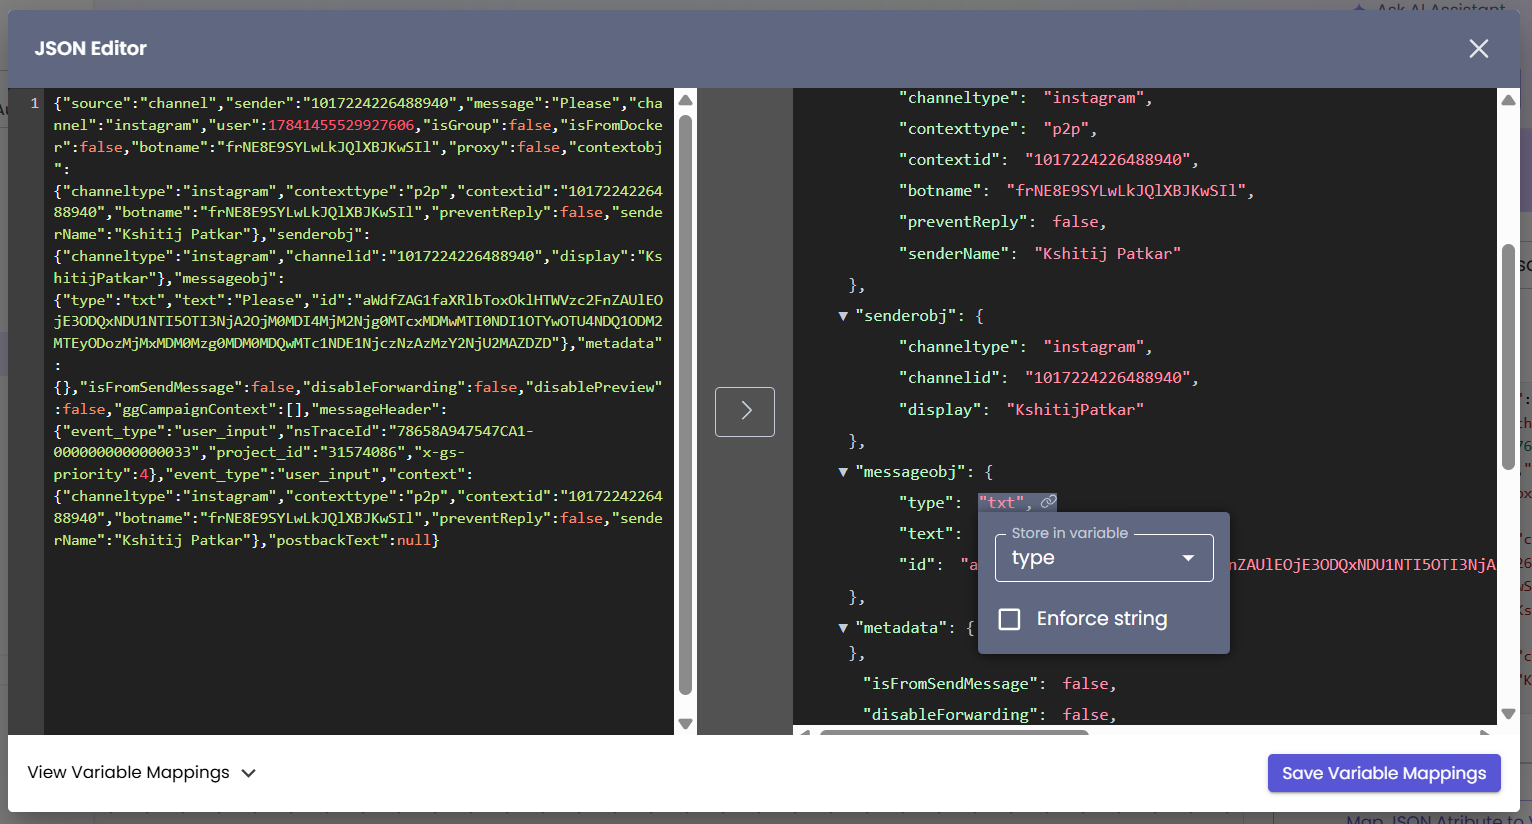
- Paste the following JSON in the left section of the JSON Editor.
{"source":"channel","sender":"1017224226488940","message":"Please","channel":"instagram","user":17841455529927606,"isGroup":false,"isFromDocker":false,"botname":"frNE8E9SYLwLkJQlXBJKwSIl","proxy":false,"contextobj":{"channeltype":"instagram","contexttype":"p2p","contextid":"1017224226488940","botname":"frNE8E9SYLwLkJQlXBJKwSIl","preventReply":false,"senderName":"Kshitij Patkar"},"senderobj":{"channeltype":"instagram","channelid":"1017224226488940","display":"KshitijPatkar"},"messageobj":{"type":"txt","text":"Please","id":"aWdfZAG1faXRlbToxOklHTWVzc2FnZAUlEOjE3ODQxNDU1NTI5OTI3NjA2OjM0MDI4MjM2Njg0MTcxMDMwMTI0NDI1OTYwOTU4NDQ1ODM2MTEyODozMjMxMDM0Mzg0MDM0MDQwMTc1NDE1NjczNzAzMzY2NjU2MAZDZD"},"metadata":{},"isFromSendMessage":false,"disableForwarding":false,"disablePreview":false,"ggCampaignContext":[],"messageHeader":{"event_type":"user_input","nsTraceId":"78658A947547CA1-0000000000000033","project_id":"31574086","x-gs-priority":4},"event_type":"user_input","context":{"channeltype":"instagram","contexttype":"p2p","contextid":"1017224226488940","botname":"frNE8E9SYLwLkJQlXBJKwSIl","preventReply":false,"senderName":"Kshitij Patkar"},"postbackText":null}- Click the Format ">" button in between the two sections.
- Then scroll down in the right section to find the "messageobj" object and click the "txt" value of "type" field.
- Select the global variable "type" that you just created from the dropdown in the popup that appears.
- Click Save Variable Mappings.
- Insert an action node called "Condition" after the "JSON Handler" node.
- Add six conditions with the variable as "type", the operator as "Equal to" and the value as each of the options below:
- “reply” (for post comments)
- “reels_comment” (for reel comments)
- “story_reply” (for story replies/reactions)
- “story_mention” (for story mentions)
- “live_comment” (for IG Live comments)
- “ad_comment” (for sponsored ad post comments)
Only one message can be sent as an Autoresponder.You can request an input from the user in the Autoresponder message and continue the journey ahead from there, but you cannot send multiple replies for the same comment/reply/mention.
How to disable Autoresponders?If you don’t wish to send a response for a certain user action i.e. you wish to disable the autoresponder, for example “live_comment”, then don’t attach any nodes or journeys to the corresponding condition.
- If you don’t wish to send a response for a certain user action i.e. you wish to disable the autoresponder, for example “live_comment”, then don’t attach any journeys to the corresponding condition.
- Insert the nodes or journey you want for replying to normal messages in your Instagram here DMs attached to the Else - Default option at the very bottom of the condition node.
- Save & Deploy this journey.
Configuring the Welcome Journey and Fallback journeys
You must configure both journeys - Welcome Journey and Fallback.Failure to do so can result in an undesirable messaging experience for your customers.
- Go back to Journeys under Bot Studio. You will see 3 Default journeys named "Fallback", "Configuration" and "Welcome Journey" respectively.
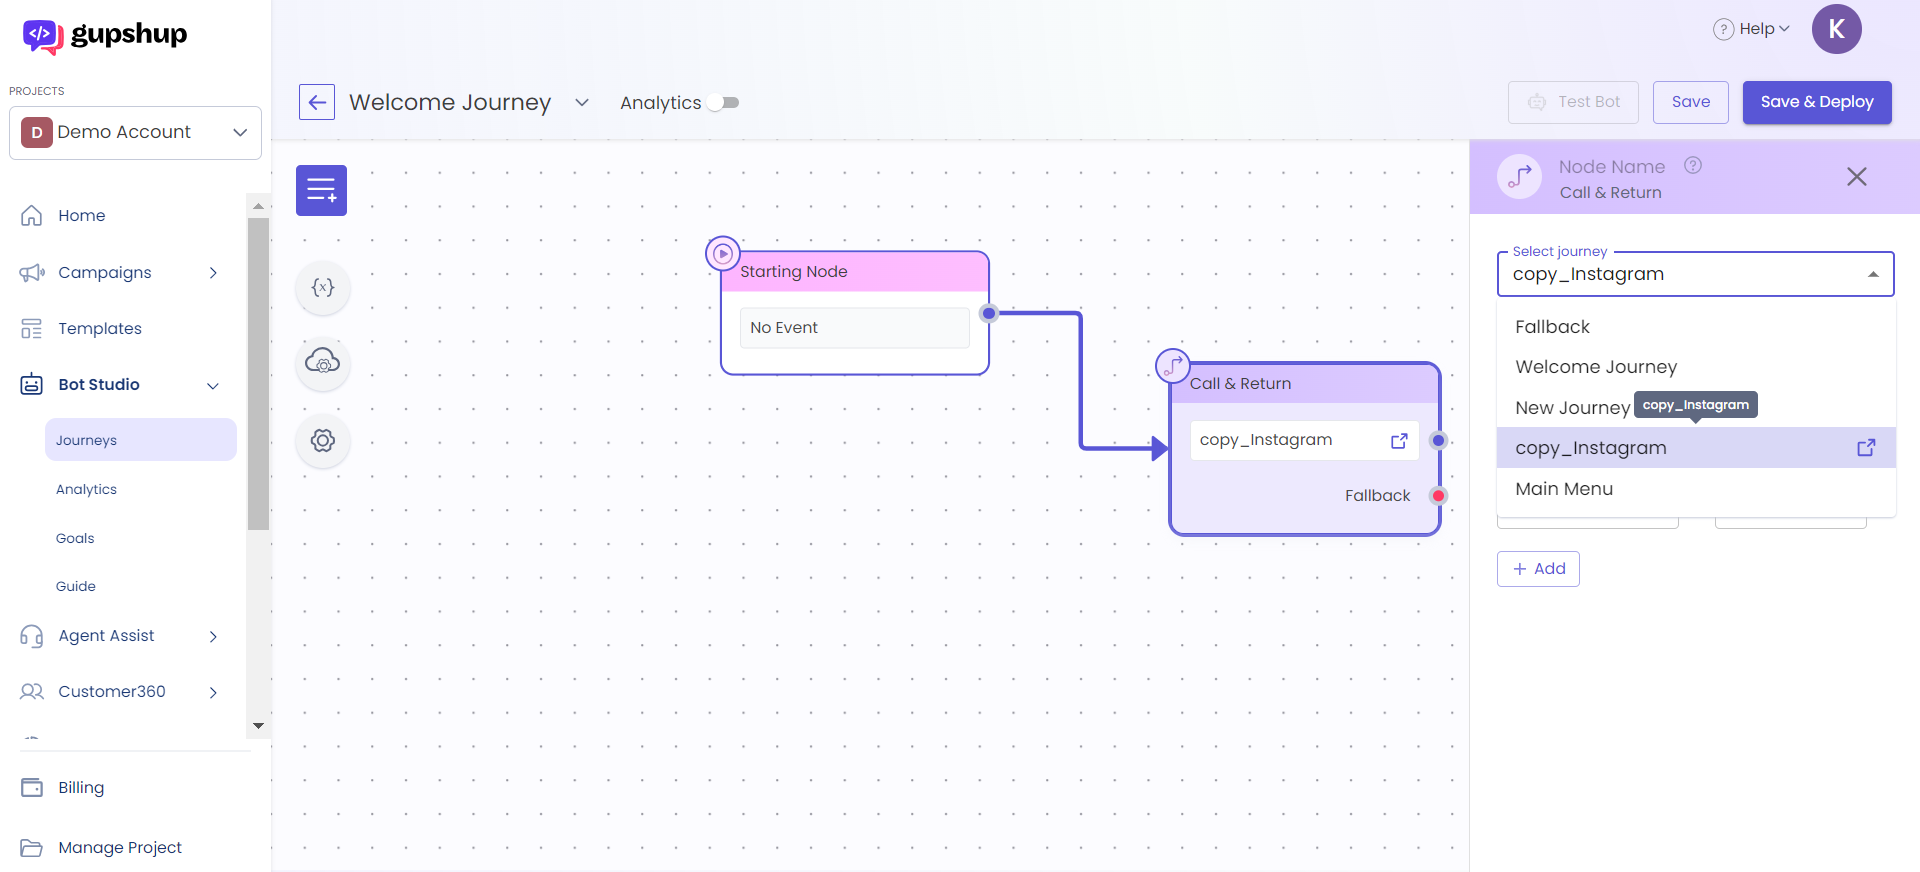
- Go to the Welcome Journey and delete the text node connected to the Starting Node.
- Add an Action node called Call & Return and attach it to the Starting Node.
- Click on the node and select the handling journey you created for Autoresponders from the dropdown.
- Save & Deploy the Welcome Journey.
- Repeat steps 2 to 5 for the default journey named "Fallback" as well.
You can further customize your autoresponders by keywords and/or the specific post/reel/story.Please get in touch with your Gupshup POC or [email protected] for the same.
Handling multiple channels along with Instagram
Please follow the steps to below to differentiate Instagram journeys:
- In your Welcome Journey & Fallback journey, please add a Condition action node right after the starting node.
- De-select the
user_inputvariable and select thechannelvariable under System variables. - Set the first condition as the variable
channel, the operator asEqual toand the value asinstagram. Then, attach the Call & Return node to that condition.
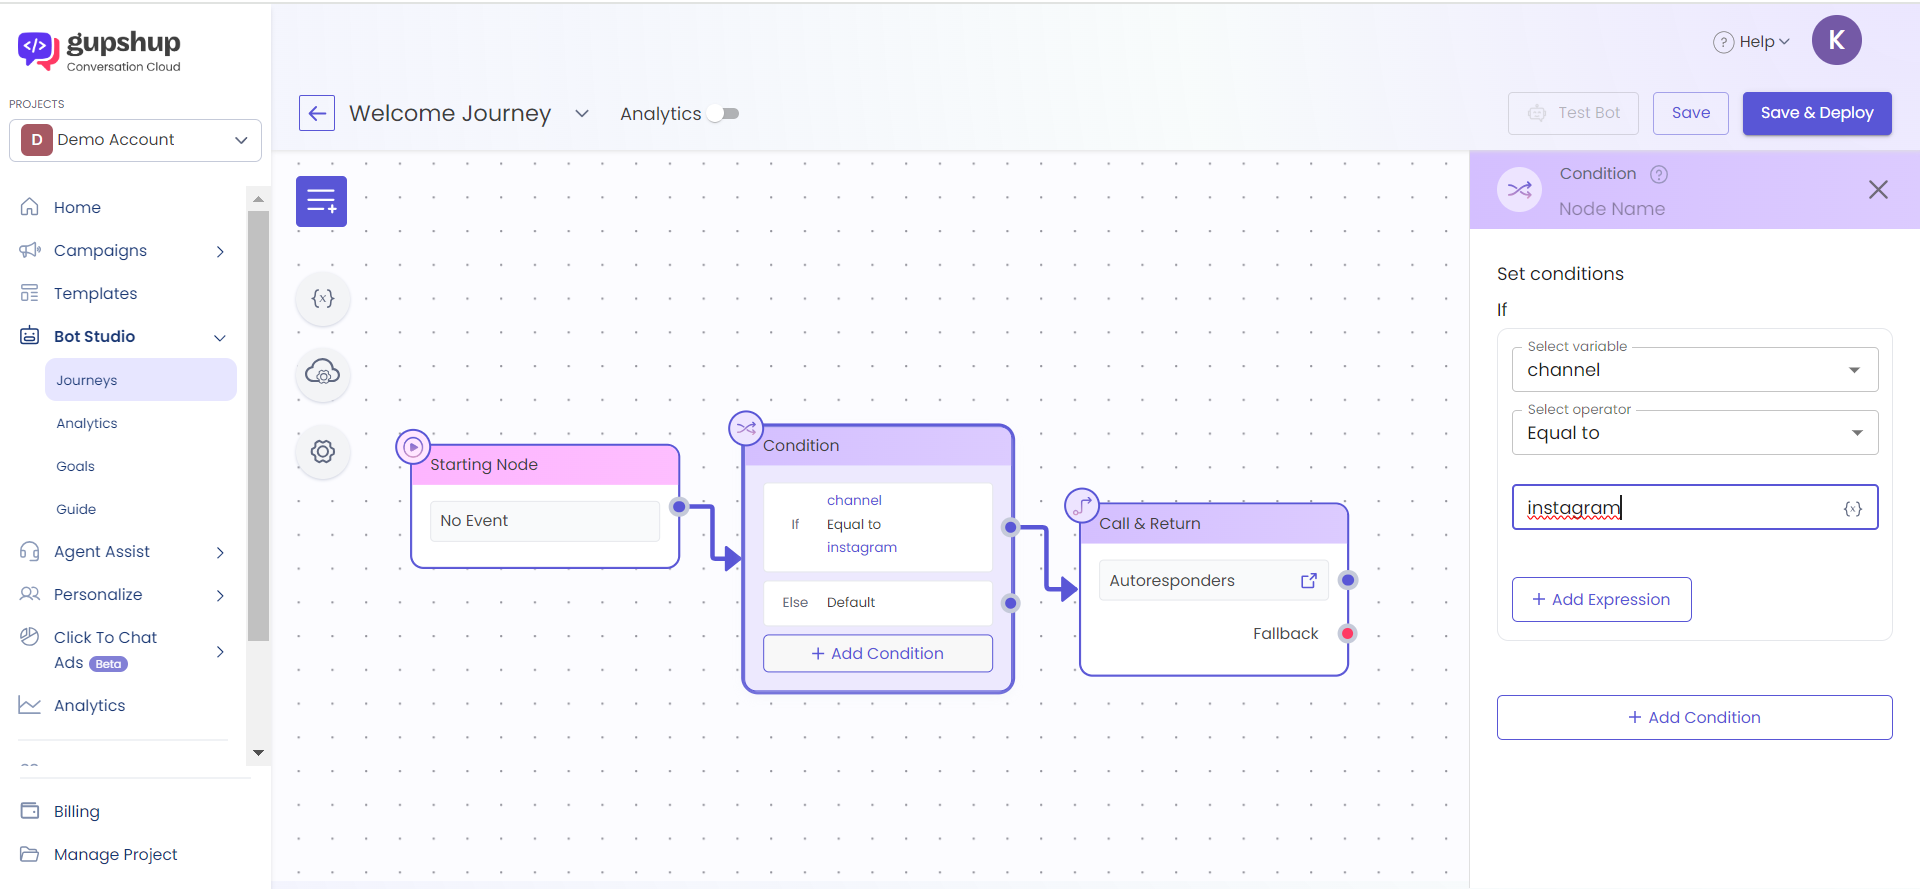
- The Welcome journeys for other channels such as WhatsApp and Web can configured by adding more conditions to the Condition node by setting the first condition as the variable
channel, the operator asEqual toand the value as:whatsappfor WhatsAppgipwebchannelfor Web
- Then attach the Welcome journeys for those channels with the respective conditions.

Updated about 1 year ago