Store Locator (on WhatsApp) and Other Templates
Templates Overview:
New Templates Added:
- Store Locator (Location based)
- Store Locator (Pin code based)
- Book an Appointment (Medical)
- Discover Courses
- Apply for a Job
- Collect User Feedback
Finding Business service location will now be more useful with just Import of a Journey Template. Businesses can now enable their customers to find store locations using Pin Code and Locations as well on WhatsApp.
Using the Location CTA feature of WhatsApp, businesses can now fetch the user location and provide the list of nearby stores on the go.
Other templates added to the pre-built library include discovering courses, job applications, medical appointment bookings, and user feedback collection.
Use Cases:
Service Centre Locator
Scenario: A customer needs to find the nearest service center for appliance repair.
Store Locator: The customer sends a message to the business's WhatsApp number requesting location information. The bot asks the customer to enter their pin code or share their current location using the Location CTA feature. The bot then provides a list of nearby service centers with addresses, contact details, and operating hours.
Benefit: Enhances customer convenience by making it easy to find the nearest service center, improves service efficiency by reducing support queries, and increases customer satisfaction with prompt, accurate location information.
Using the Store Locator (Location Based) Template:
To effectively use the Store Locator templates, you need to have a database in place. Here's a structured guide to set it up:
Database Creation:Prepare a database that contains information about the stores. For this example, we have included a few sample mobile phone stores with their respective Latitude and Longitude coordinates.
Database Details:Ensure the database contains the following fields (you can add more details if needed):
- Store Name
- Latitude
- Longitude
Search Functionality:When the bot performs a search for the nearest stores, it will use the Latitude and Longitude data to find and display the results.
.
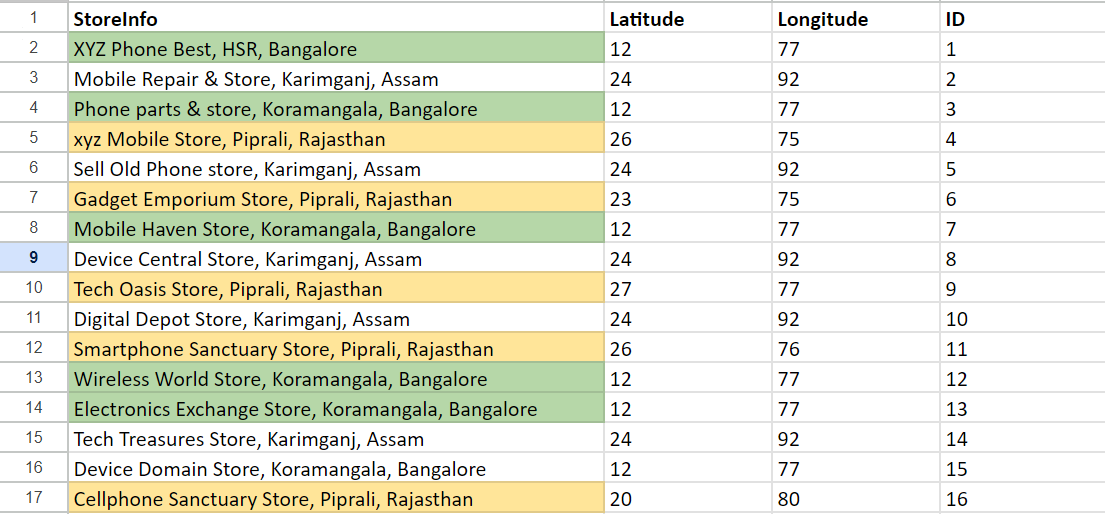
Sample database
To use the database in the journey, create a database from the 'Journeys' page. You can get the complete guide to use the database here - Database with Journey Builder. Once the details are added on the database you are ready to start creating your journey as required.
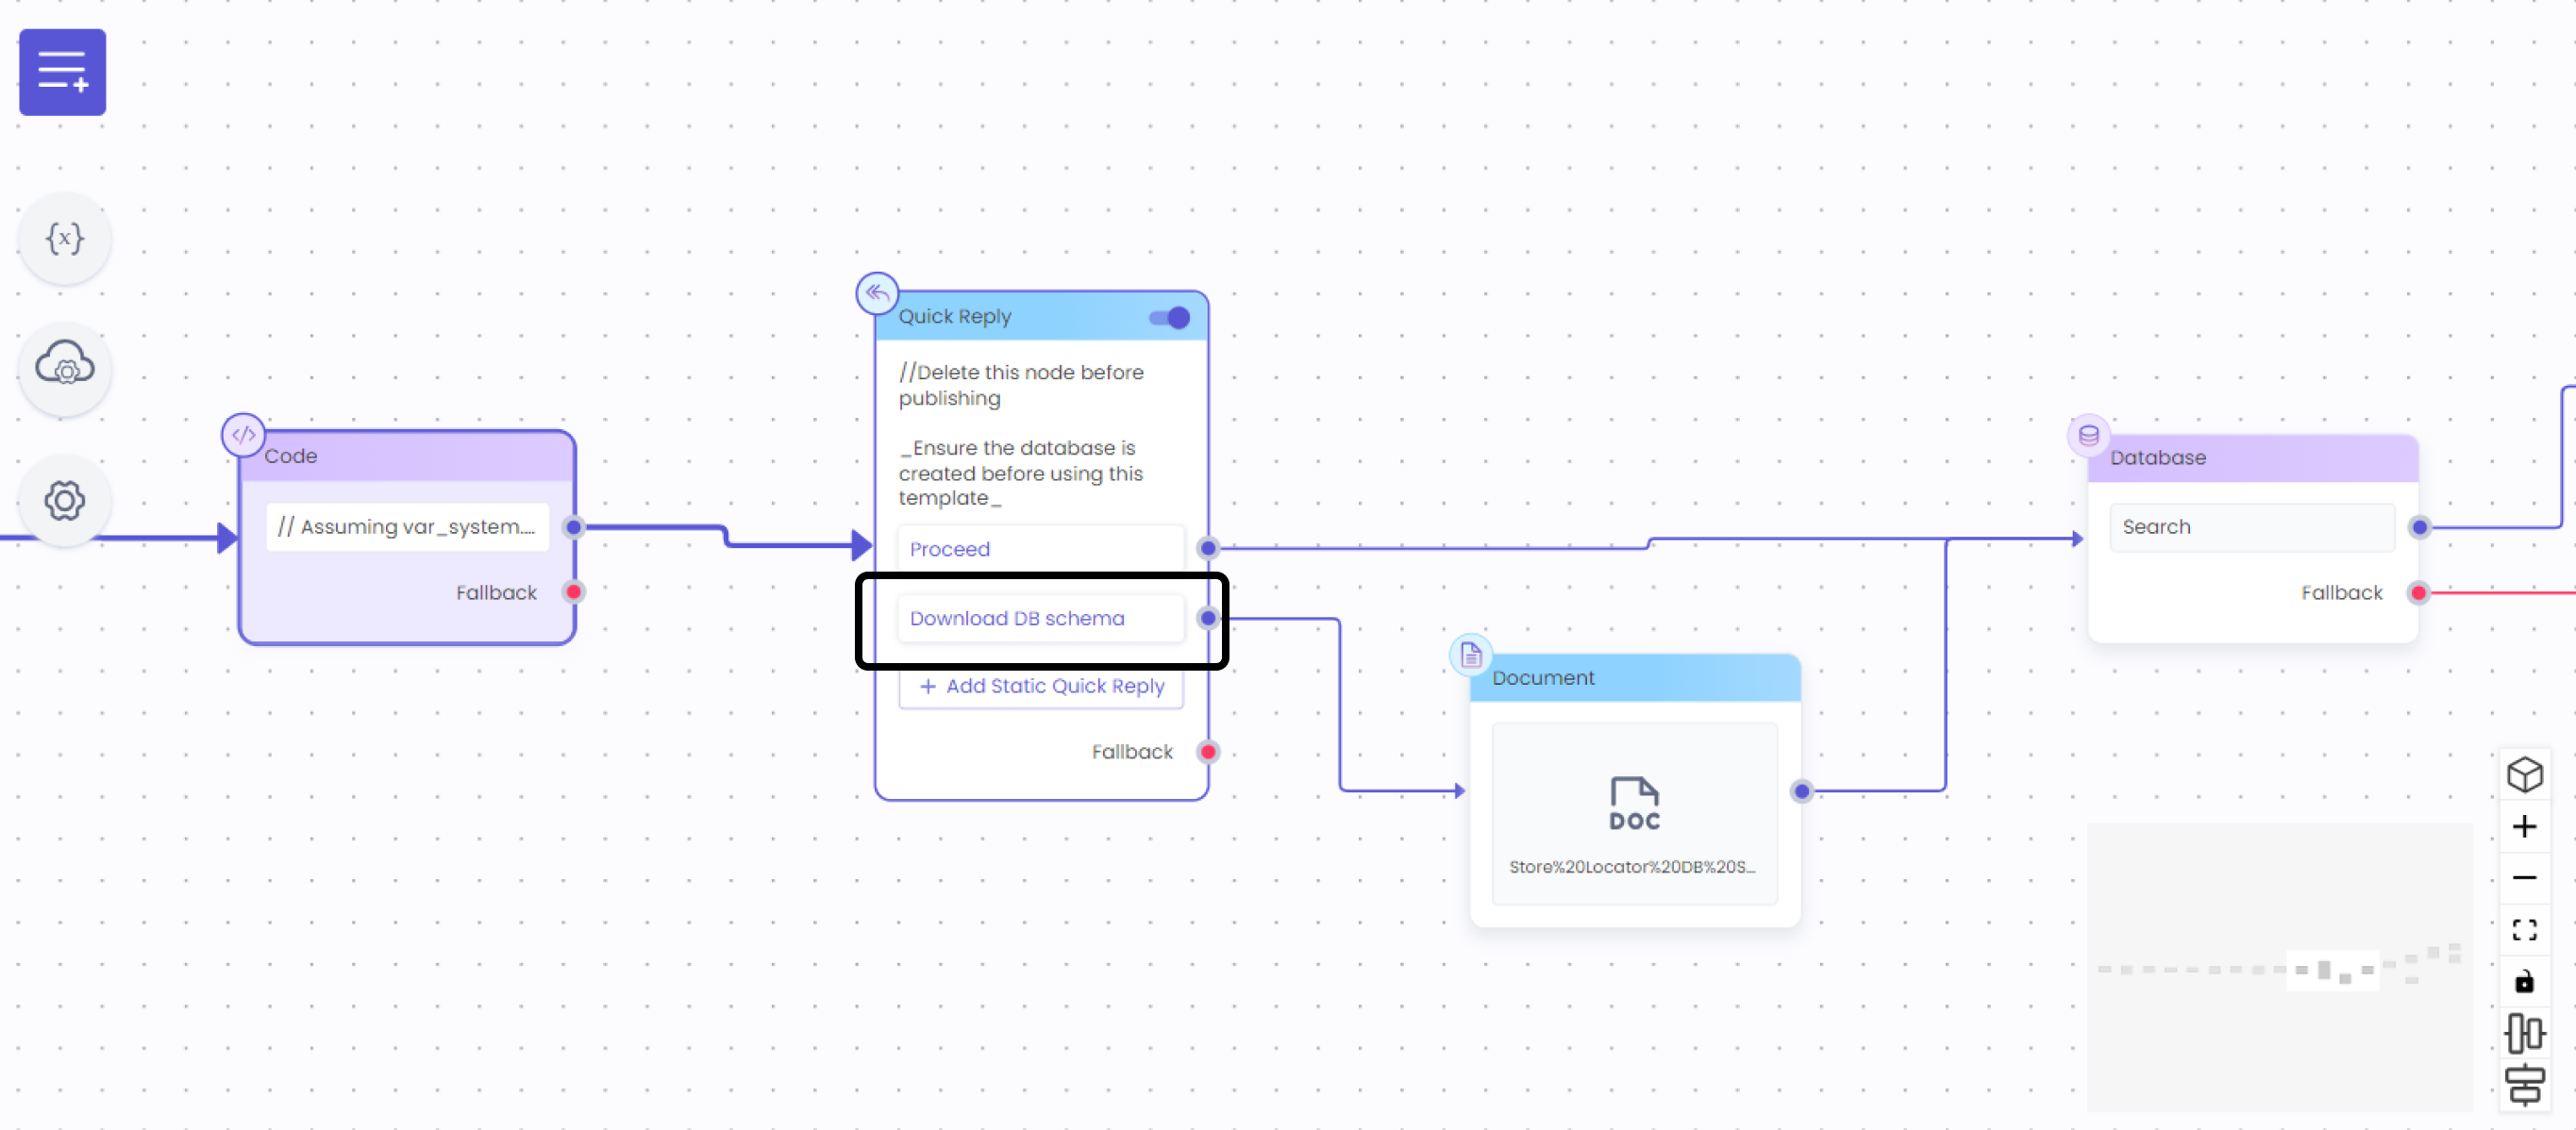
Also you can download the sample database that is used here by running the journey and selecting this option
You can customize various aspects of the journey according to your needs. Here are some key points and tips for tweaking the process:
Database Node Usage:The database node allows you to utilize the stored database in the journey. This is where all the store data (including Latitude and Longitude) is accessed.
Use of Variables to store user location:The variables {{var_local.usr_latitude}} and {{var_local.usr_longitude}} store the user's latitude and longitude, which are obtained from the location information provided by the user.
Radius Logic for Store Search:To create a search radius around the user's location, we use a logic of ±2 degrees. This means the bot searches for stores within a boundary that extends 2 degrees north, south, east, and west of the user's coordinates.
Customizable Code:The current logic can be modified to suit your specific requirements. For example, you can:
Adjust the radius size to a different value.
Implement more complex geospatial calculations for a more accurate radius.
Incorporate additional filters based on other store attributes (e.g., store type, rating).
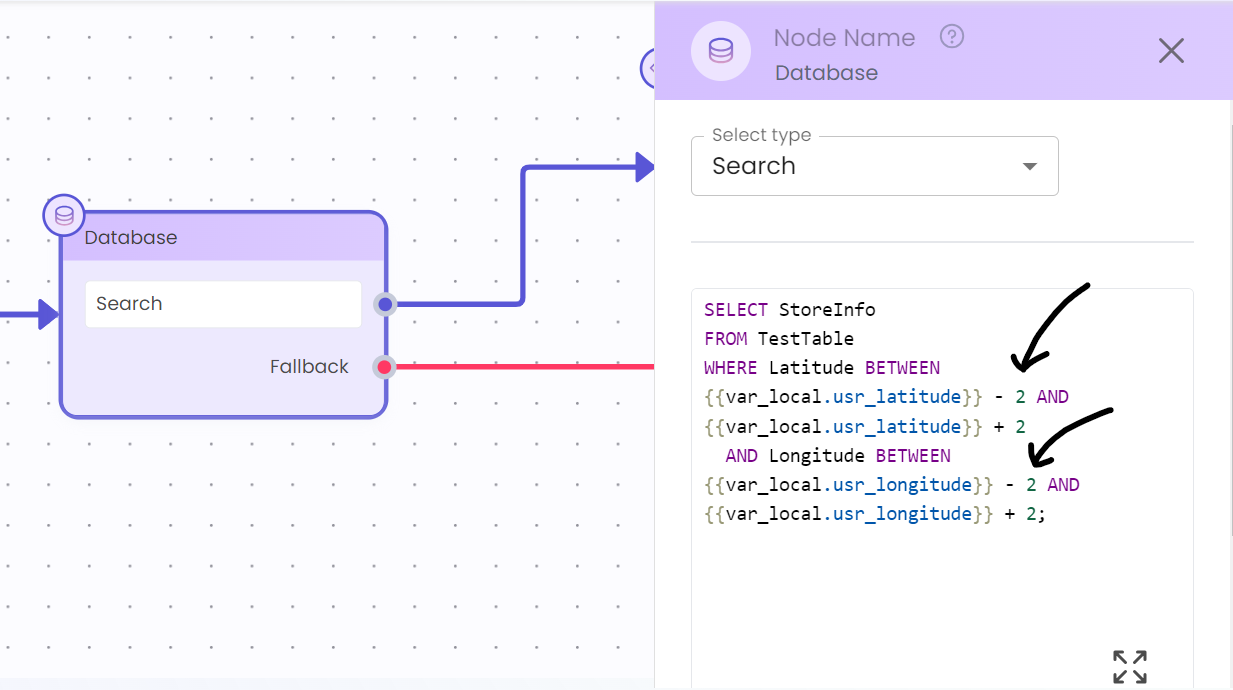
Database node SQL code
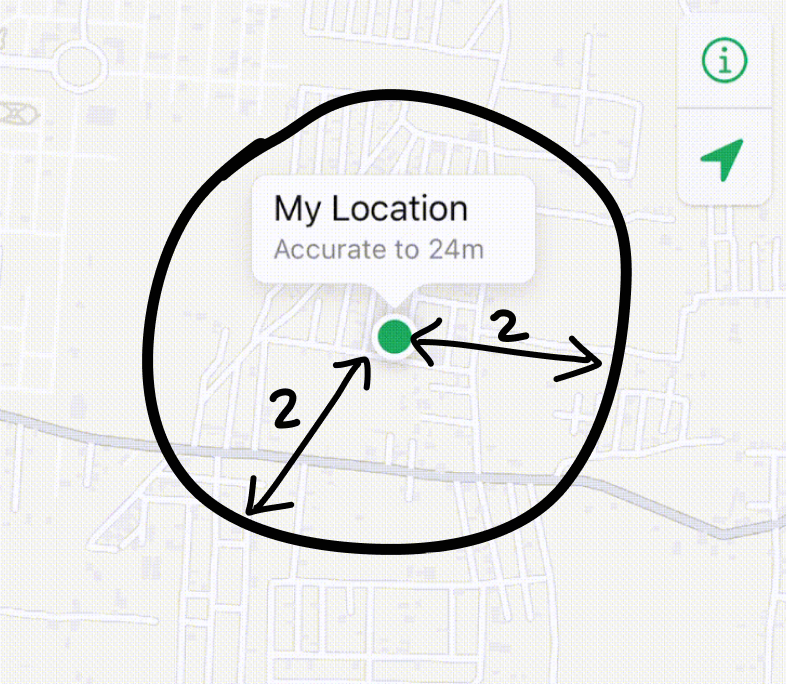
How the SQL query is working
You can further customize the journey by determining how precise you want to store the latitude and longitude of the user's location. In this example, we store only the integer values to keep it simple. However, you can modify the code to store latitude and longitude with as many decimal places as needed for greater accuracy.
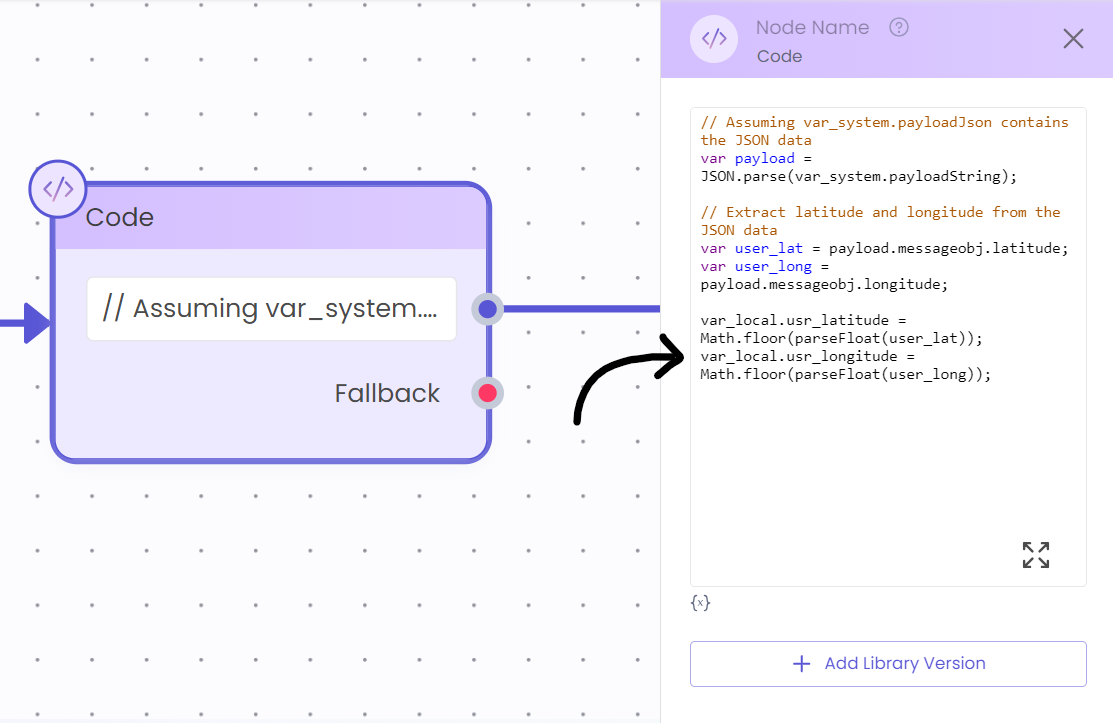
code where only integer value is taken
The final journey looks like this:
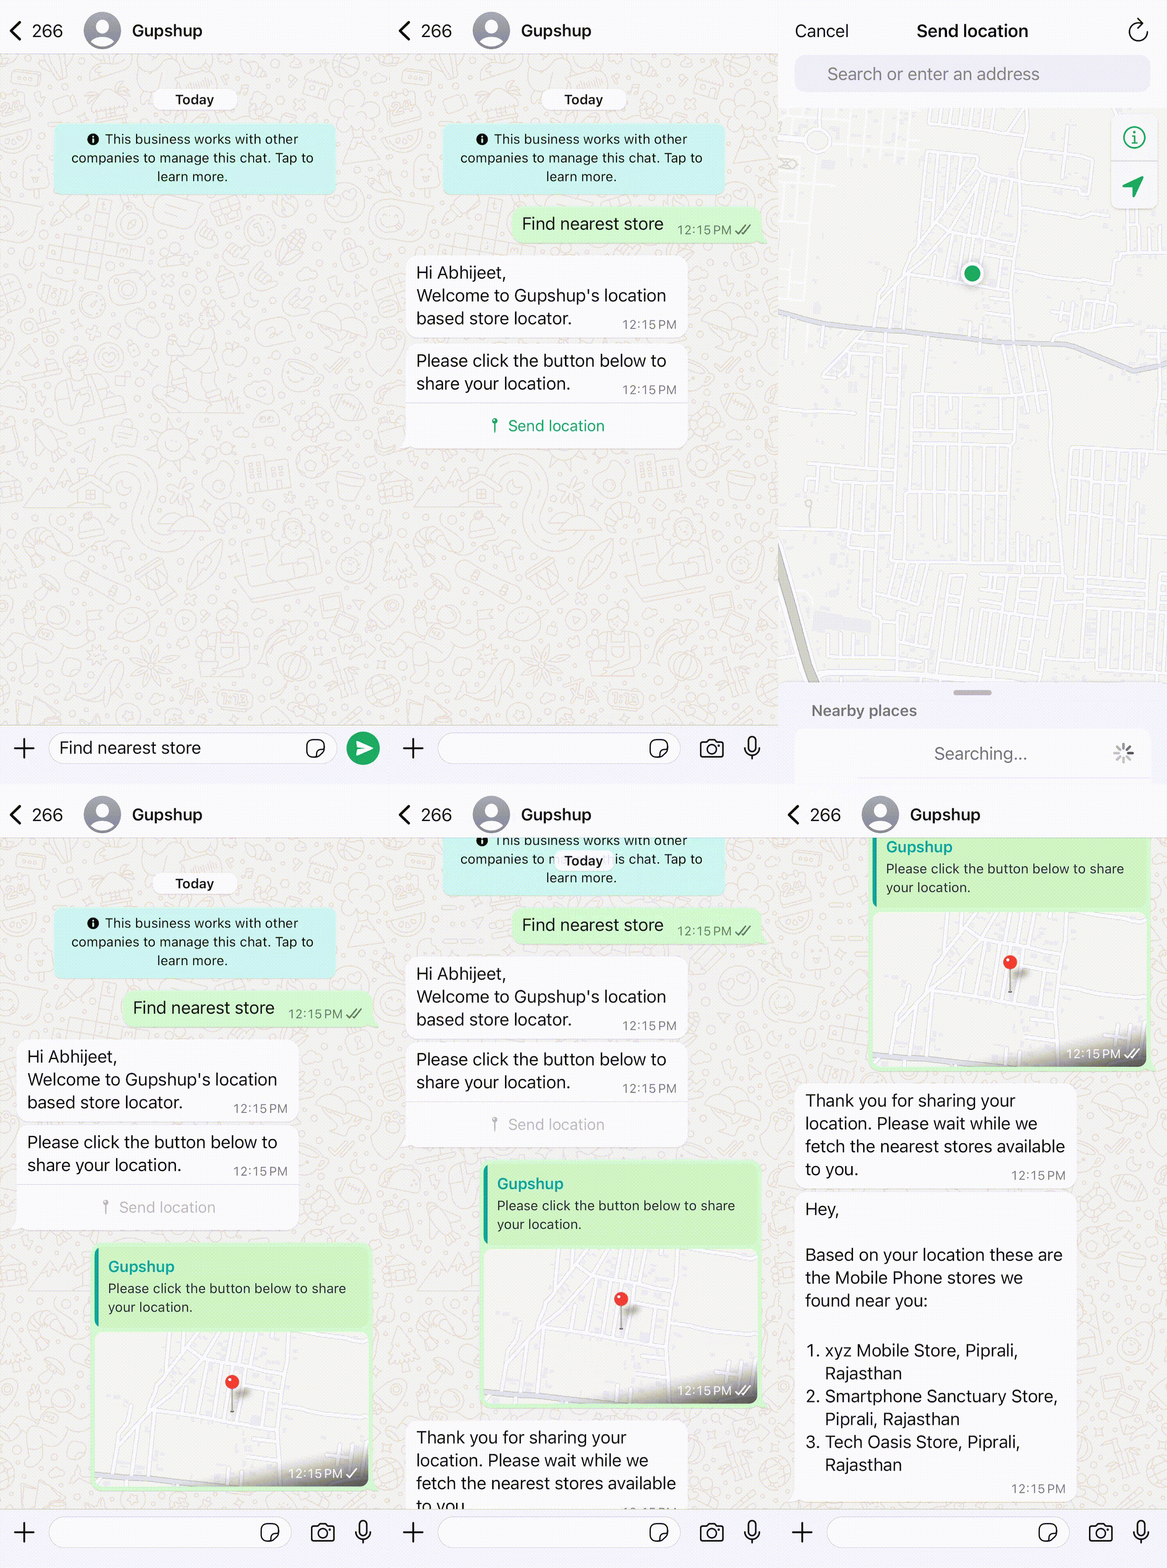
Store Locator (Location Based) journey
Updated 7 months ago